The Image Server
Here is a guide to the Coordinator tasks and Actions for the Image Server.
See also Using the Image Server for transcribers.
Overview
The terminology
It is important that you understand the terms that we use with image management. You are already familiar with the basic terms and structure that we use to describe the data in FreeREG: we have multiple Counties; each county can have multiple Places; each place can have multiple Churches; and each Church can have multiple Registers. We then go down to Record Types, Files, Batches, Entries and Search Records.
With Source Images we have another, separate tree structure: each Register can have multiple Sources of Images (currently the only source is the FreeREG Image Server); each Source can have multiple Image Groups (a Group will often be Images of a specific register book); and each Group can have multiple Images.
Please note that Groups created from the FreeREG 1 image set are logical structures inferred from the name of the Image file — such Groups are not physical structures on the image server.
Who does what
Just as with the management of the Data tree, different people have different roles in the management of the Image tree. The County Coordinator (CC) is responsible for entering the information that describes the Source and Group, including ownership and usage restrictions (if any). The CC may also assign a Degree of Difficulty for the Images in a Group by viewing the images. The CC is responsible for Allocating a Group (or Groups) to a Syndicate for transcription. Finally, the CC decides that an Allocation is Completed.
The Syndicate Coordinator (SC) is responsible for managing their Allocations. The SC may update and adjust the Degree of Difficulty for the Images in a Group by viewing the Images. The SC will Assign Images from a Group to a Transcriber for transcription. The SC can check the work and accept as Transcribed or Assign another transcriber to Review the transcription. When the Review is finished, the Assignment is marked as Reviewed. The SC can both Unassign and Reassign an Assignment. When all Images in an Allocation have been transcribed to the satisfaction of the SC, the SC clicks a button which automatically sends an email to inform the CC that the Allocation has been transcribed.
The Transcriber is responsible for accessing their list of Assignments, for Viewing and/or Downloading the Images and then protecting any downloads according to the instructions and any covering materials. They are expected to check their transcriptions and then indicate to the SC by clicking a button that the Assignment is complete: there is an option on their Assignment listing to do this.
Transcribers can view a list of the Allocations available to their syndicate: this will help both the transcriber and their SC to decide on the next Assignment. Transcribers can also view a list of available Groups in other counties, if they wish.
The workflow
With Images uploaded to the server, here is the full workflow for managing the Allocation and Assignment of images (for full details of each step, follow the link given):
- The CC initialises the images by setting up the Sources and Image Groups and then setting the transcription Status
- The CC Allocates the Image Group(s) to a syndicate
- The SC Assigns Images in a Group to a transcriber
- The transcriber transcribes the Images and then notifies the SC when finished
- The SC checks the transcription and if desired, Assigns to a Reviewer
- The Reviewer reviews the transcription and notifies the SC when finished
- The SC checks and, if satisfied, submits the Group back to the CC as completed
- The CC marks the Group as completed
County Coordinator tasks
When Images are first added to the server, the information about the Images, Group and Source is very limited. So, we need County Coordinators to complete the initial setup — mostly once-only tasks.
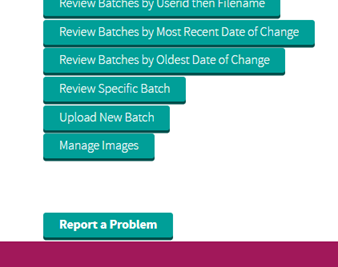
As a CC, you can access the image management actions by selecting Manage County
, then Manage Images
:
Set up Sources
Your first task is to add information about the Source. Since all the current images are on the FreeREG image servers, the name of the Source is simply Image Server
. We need you to add additional information you know about: who provided the Images; who prepared them and how; and any restrictions on their use and dissemination, including whether or not they can be considered Open Data.
After selecting Manage Images
you will be presented with a list of all Sources for your county listed by place, church and register:
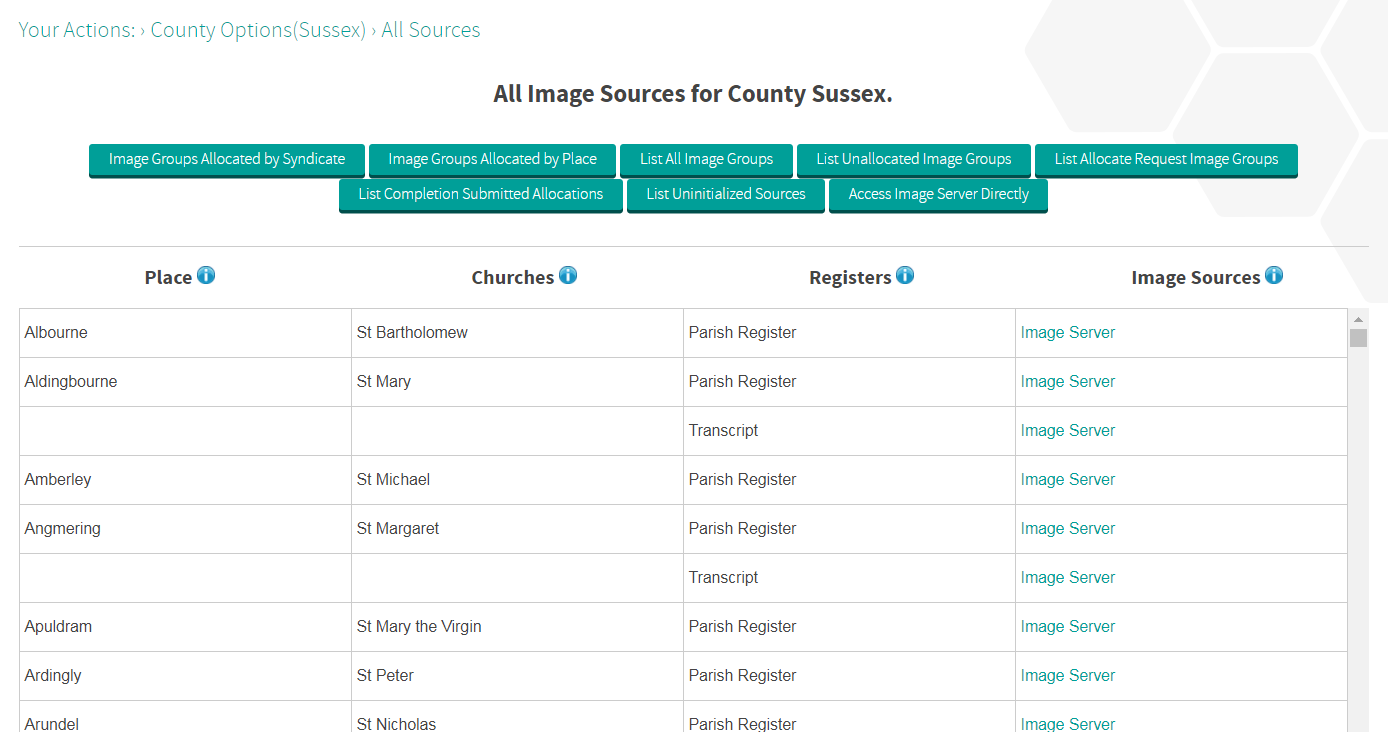
Select a source by clicking on Image Server
in the rightmost column for the chosen register and you will be presented with a number of actions for the image server Source:
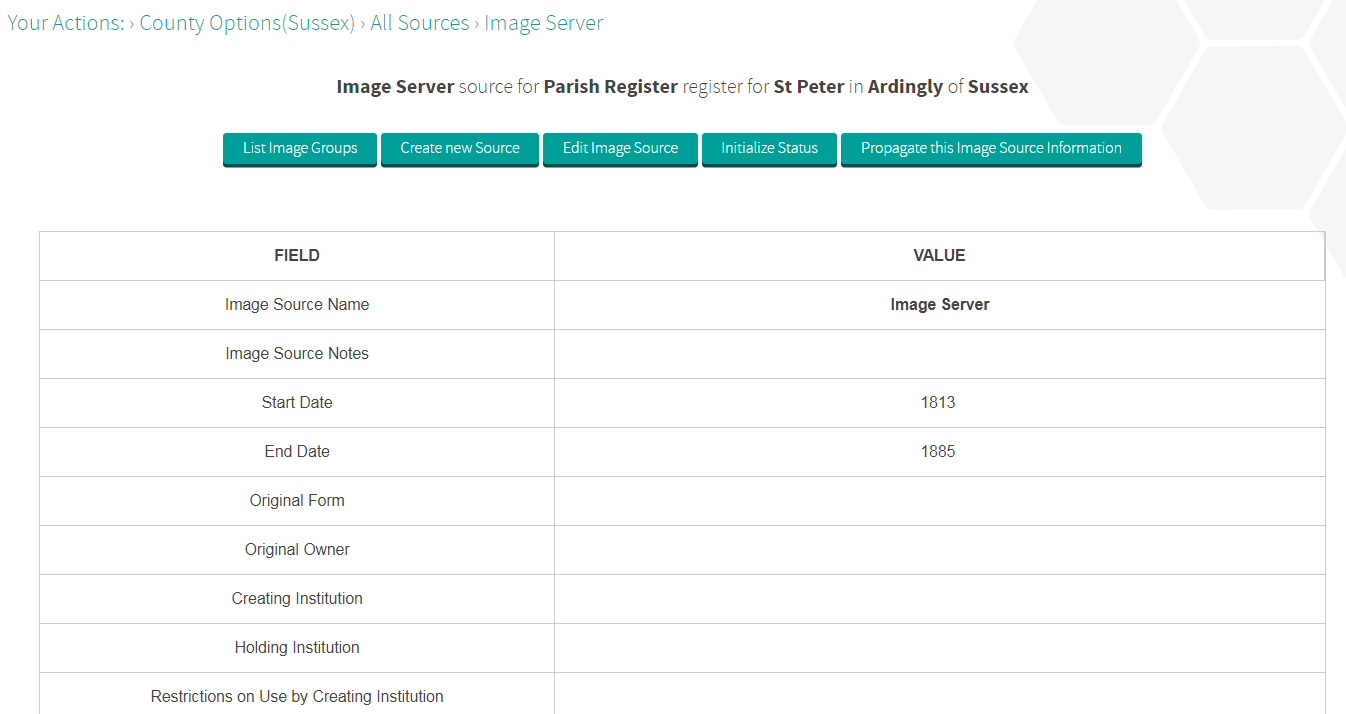
Select Edit Image Source
and you will then be able to fill in the appropriate information in the relevant boxes:
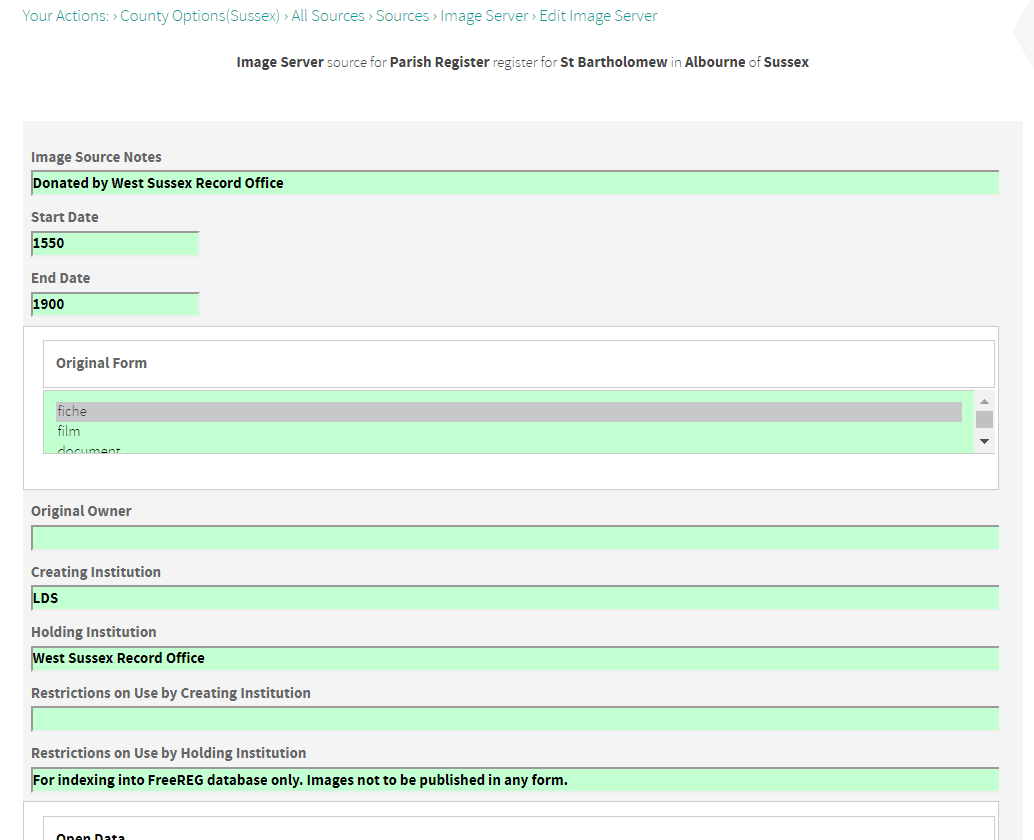
When you are done, click Submit
, at the bottom of the page.
Since many (or all) Sources for a given county may have the same basic information, there is an action to Propagate this Source information
(see Figure 3, above) to other register Sources:
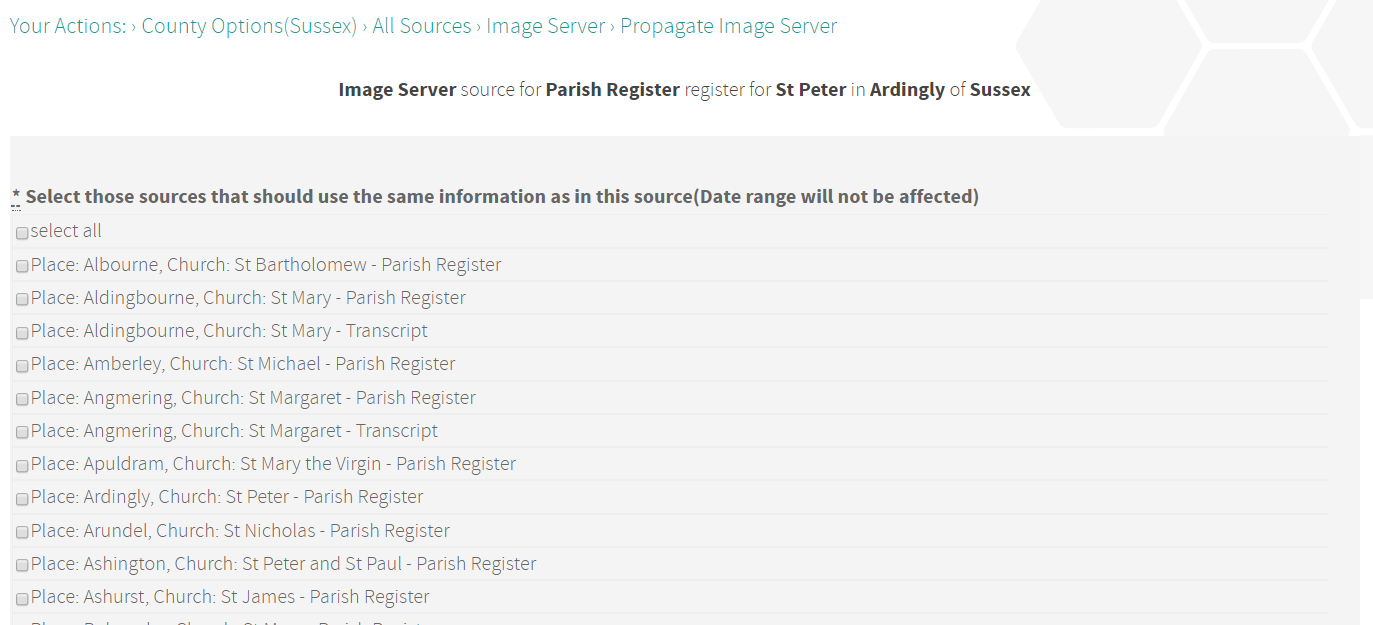
Select the register(s) you want to propagate the Source details to. You can select one, all or a range of registers by clicking the first register, then holding down the Shift key and clicking the last in the range. Then click Submit
, at the bottom.
Specific register Sources can be edited individually if required, where the standard content needs refinement. This is done by selecting Edit Image Source
— Figure 3.
Set the Status
The default (opening) transcription Status of the Images and Groups for a Source is not defined (uninitialized). It is essential that the system knows the Status for it to work as designed. All other Image and Group actions depend on their Status being in a defined, specific state. So, it is important to set the Status correctly.
You may have many Images on the server that have been transcribed or completed already: you need to set the Status of these to Transcribed or Complete, as appropriate. You may also have a number of new Images that you would like to be able to Allocate: you need to set the Status of these to Unallocated. This may sound like a lot of effort, but you have two actions designed to reduce your workload.
The first is the action to List Uninitialized Sources
: it is available on the display of the list of all Sources (see Figure 2). You can use this list to identify those Sources where setup is incomplete.
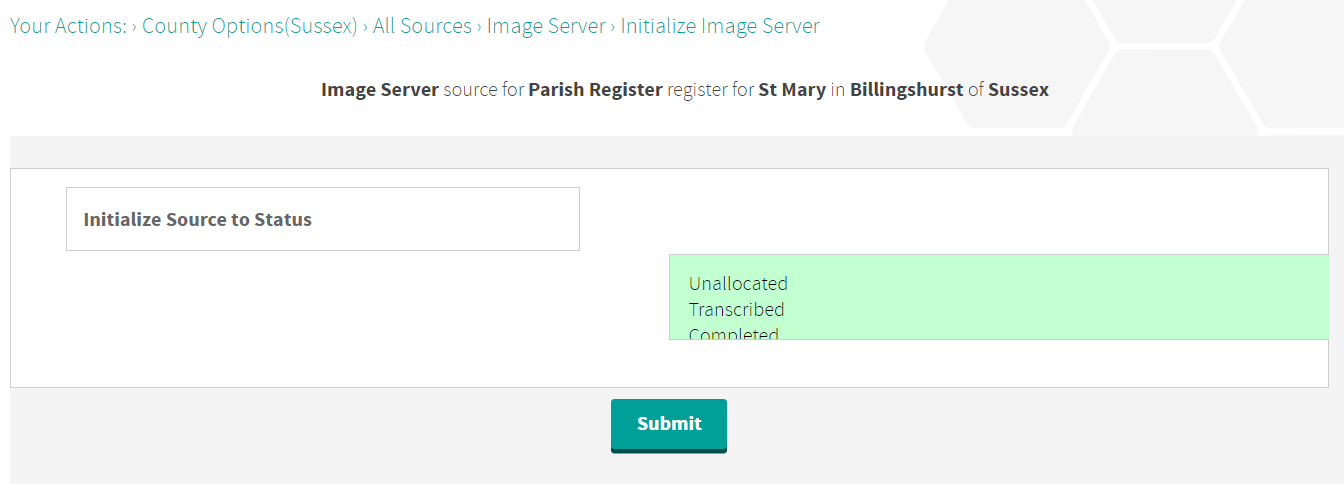
The second is the action to Initialize Status
which is available on the display that shows details of a specific Source (see Figure 3). This action enables you to set the Status for all Images in the Source to Unallocated, Transcribed or Completed. However, it will not work if the status of any Image under that Source has already been set:
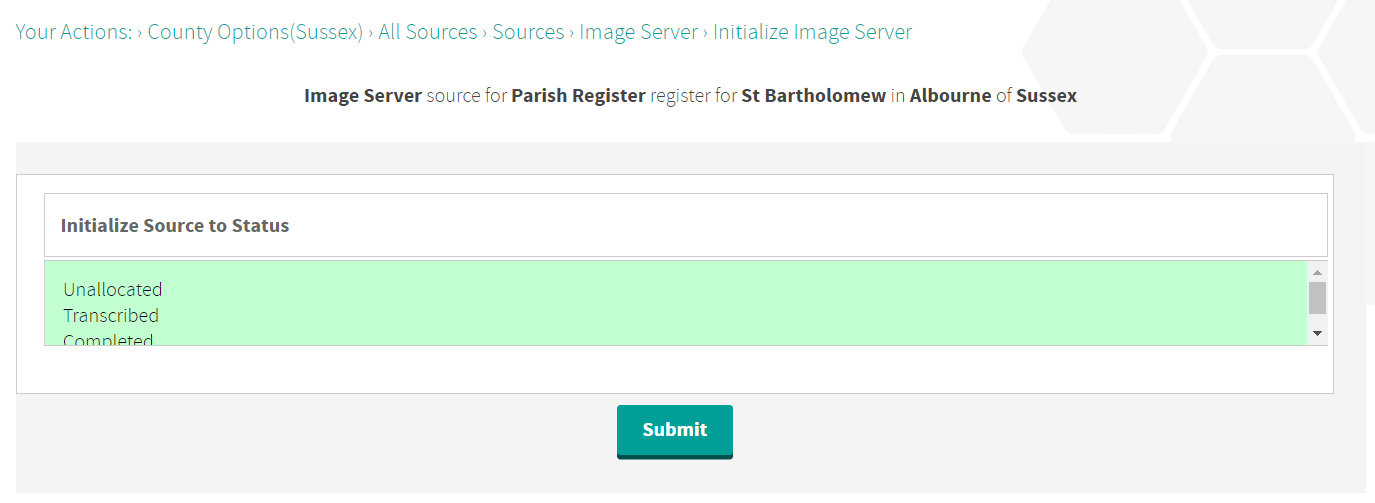
Commonly, you will want to initialize the status of a Group to Unallocated, so that it becomes ready for Allocation. If some Groups under a Source have already been transcribed or completed, the most efficient way to set the status is to first initialize all Groups in the Source to Unallocated. Then for Groups that have been transcribed or completed, from the list (Figure 6) select SH
to show details of the Group:
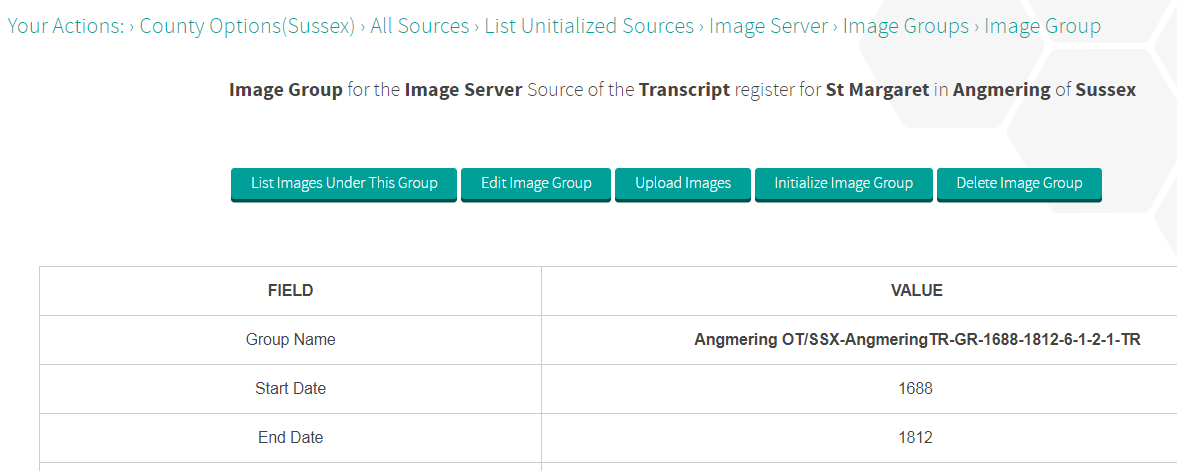
Please note that you can’t change the name of an Image Group. If you wish to alter the name, or divide up a Group, then create a new Image Group and use the action available to move Images to this new group(s). You can then delete the unwanted Group.
See the page on Uploading Files to the Image Server for details of how to create new Image Groups and set them up. See below, Set up Images, if you need to move images between Image Groups for the same Source (and hence, Register).
If you need to move the images to a different Source, such as to a different Register Type, the process is a little more involved: you have to download the images and then upload them to the new Register Type and Source (taking care not to duplicate any image filenames); finally, arrange the deletion of the images from the old Image Source and Group, which can be done only by System Administrators.
Now select Initialize Image Group
:
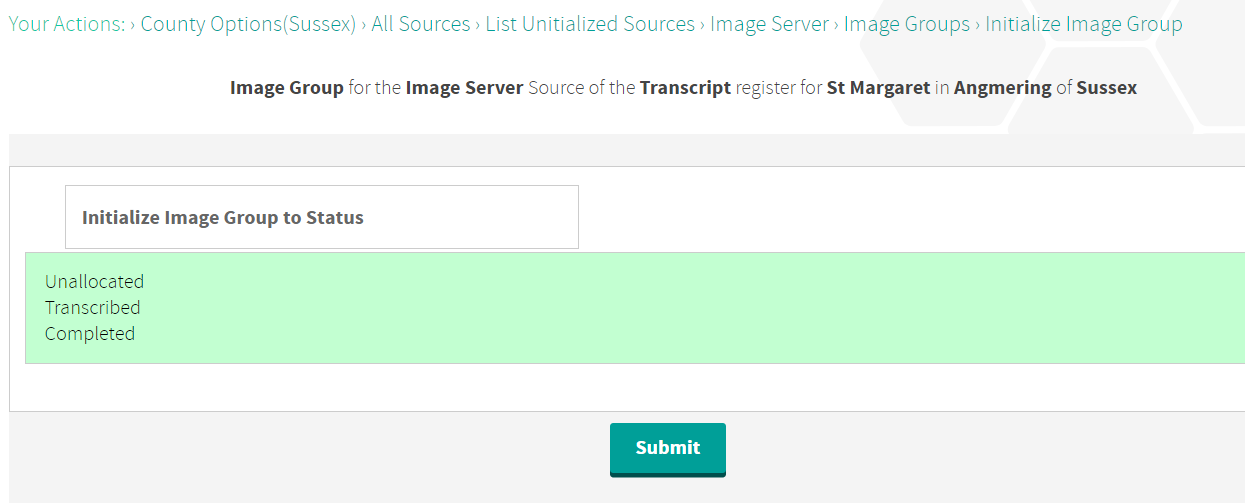
If you set the status of an Image Group to Unallocated
, the Group will appear in the list available for transcribers to choose work.
Select the status you require and click Submit
.
Set up Groups
The date range of an Image Group has been inferred from the image file names. In some cases the start and/or end date for a Group may be outside of the date range of the Source. Such dates are coloured red. You may wish to correct these dates in the Group and/or the Source as appropriate.
To edit dates and other details for a group, select List Image Groups
from the Source actions (Figure 3) above to see the Groups in that source:

Now select ED
in the actions in the rightmost column and you can edit the dates and Group name, and also add any notes:

Set up Images
Certain information can be entered for images, such as Difficulty (skill level required) and any specific notes, if desired. Select List Images Under This Group
from Figure 9 to show:

Then select the ED
action to edit an image:
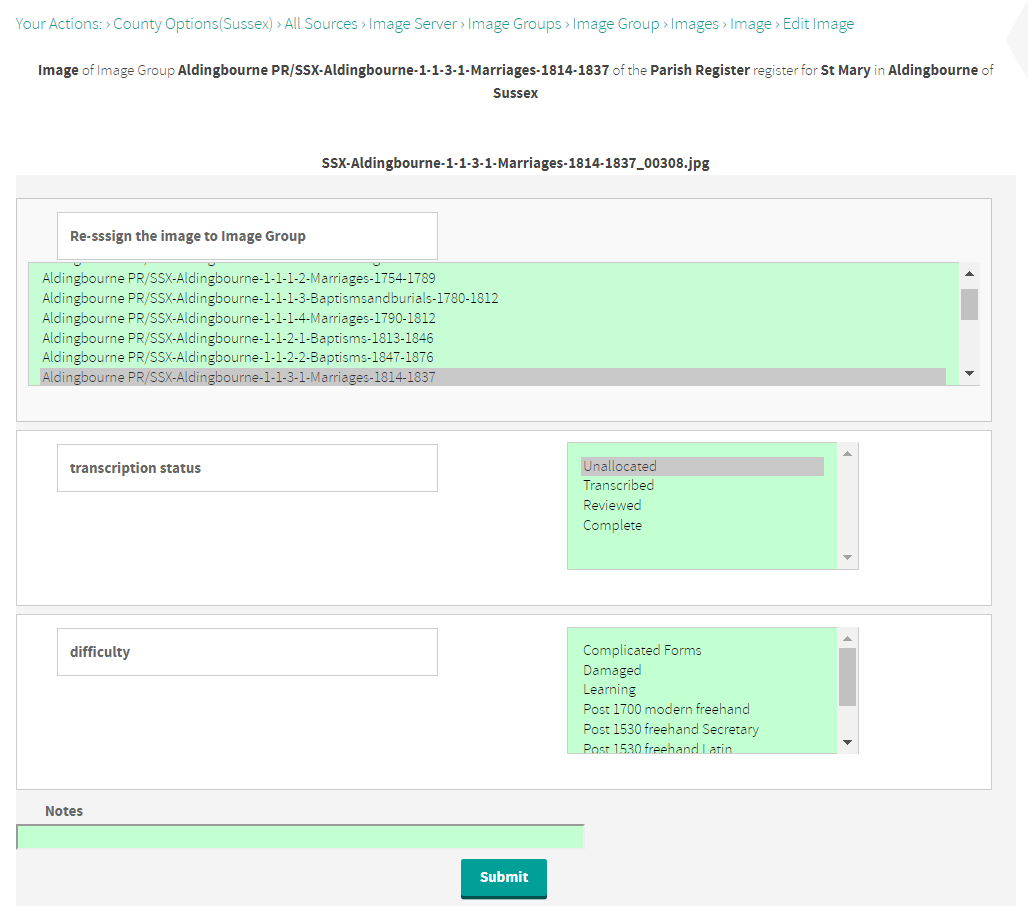
From here you can set the transcription Status, the difficulty and add any notes. You can also move (Re-assign
) the Image to another Group in the Source, if required. Finally, click Submit
.
Difficulty and Status can be propagated to other images in the Group from the list images display (Figure 11). For example, Propagate Difficulty
:
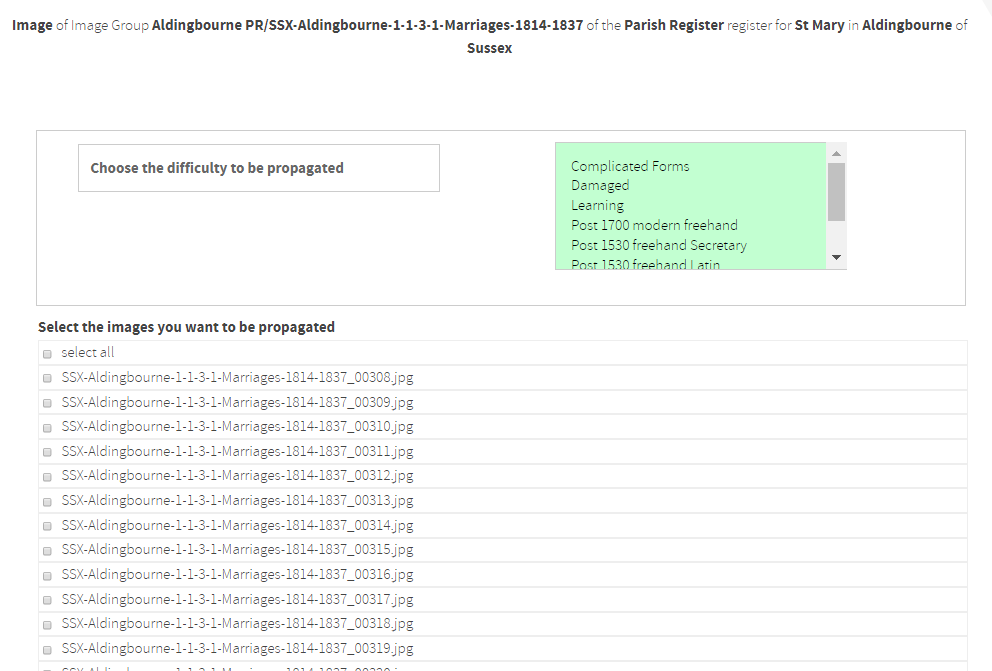
Choose the Difficulty and select the relevant images, then click Submit
at the bottom.
Allocating image groups to a syndicate
As CC, you access the image management actions by selecting ‘Manage County’ then ‘Manage Images’:

An image Group must have the status of Unallocated to be available for Allocation. To set the Status of a Source, click on Image Server
in the right hand column of the desired place, church, register:

Click Initialize Status
,
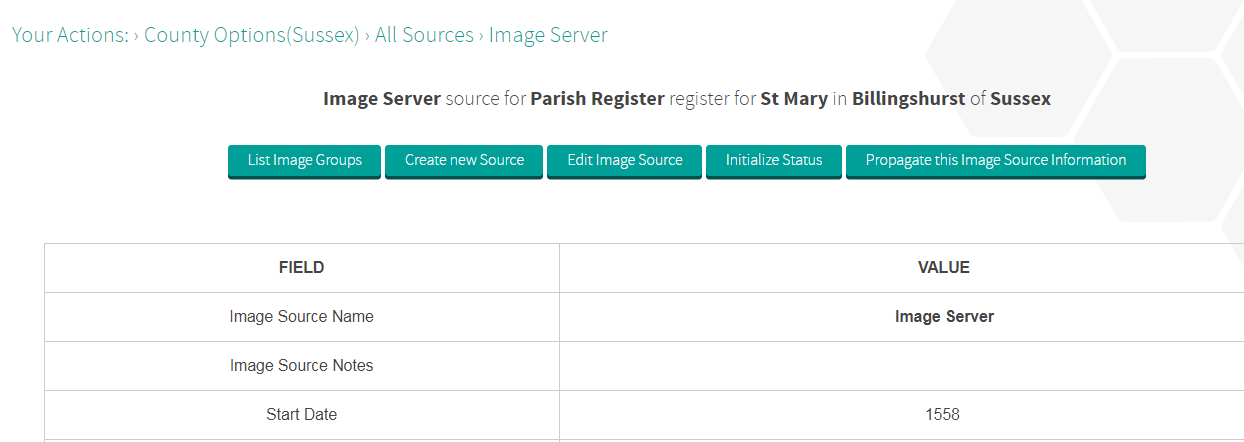
then select Unallocated
and click Submit
:
From the top level of All Sources (Figure 15), select List Unallocated Image Groups
to see the Groups:

Select Image Server
in the Sources column for the Group(s) to be allocated, followed by List Image Groups
to see the list of groups:
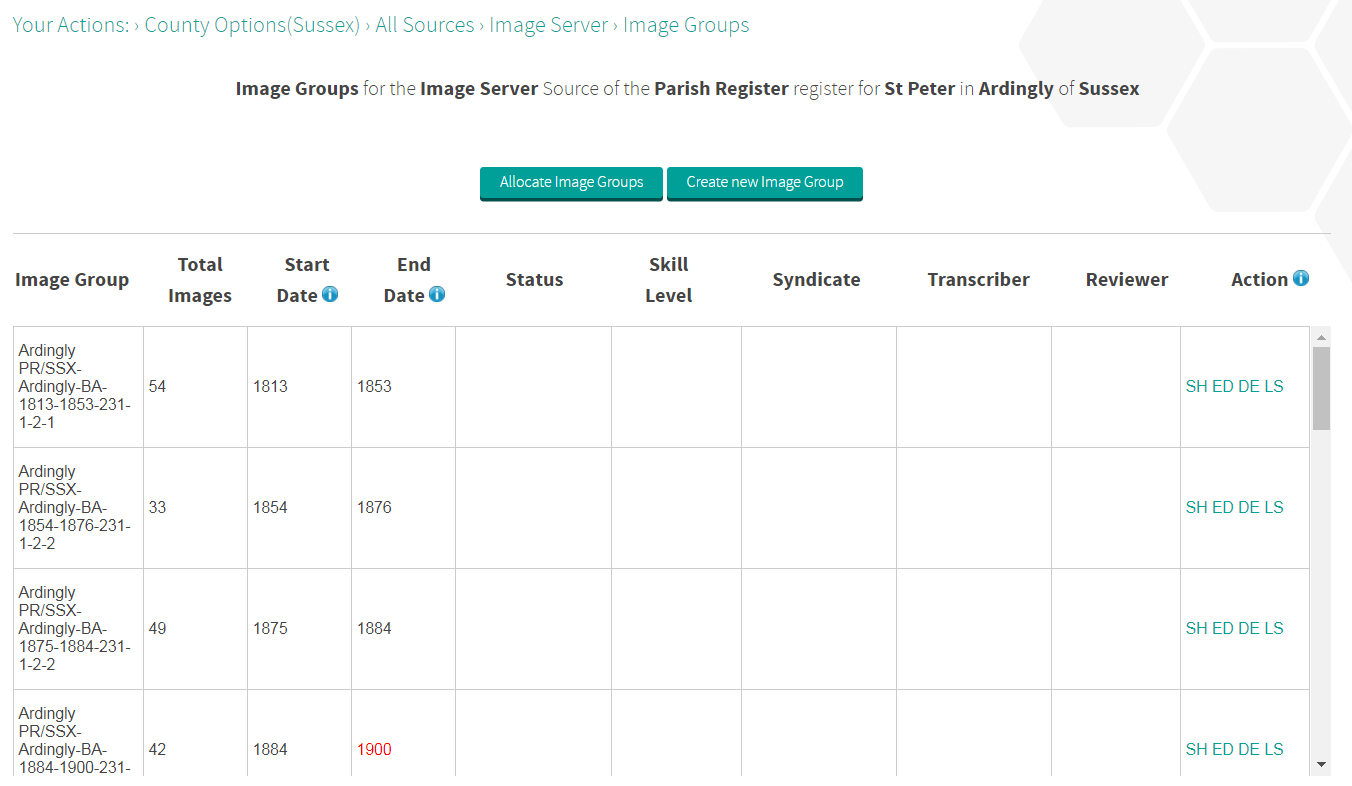
Select Allocate Image Groups
, then select the relevant syndicate and Group(s). Lastly, click Allocate
:
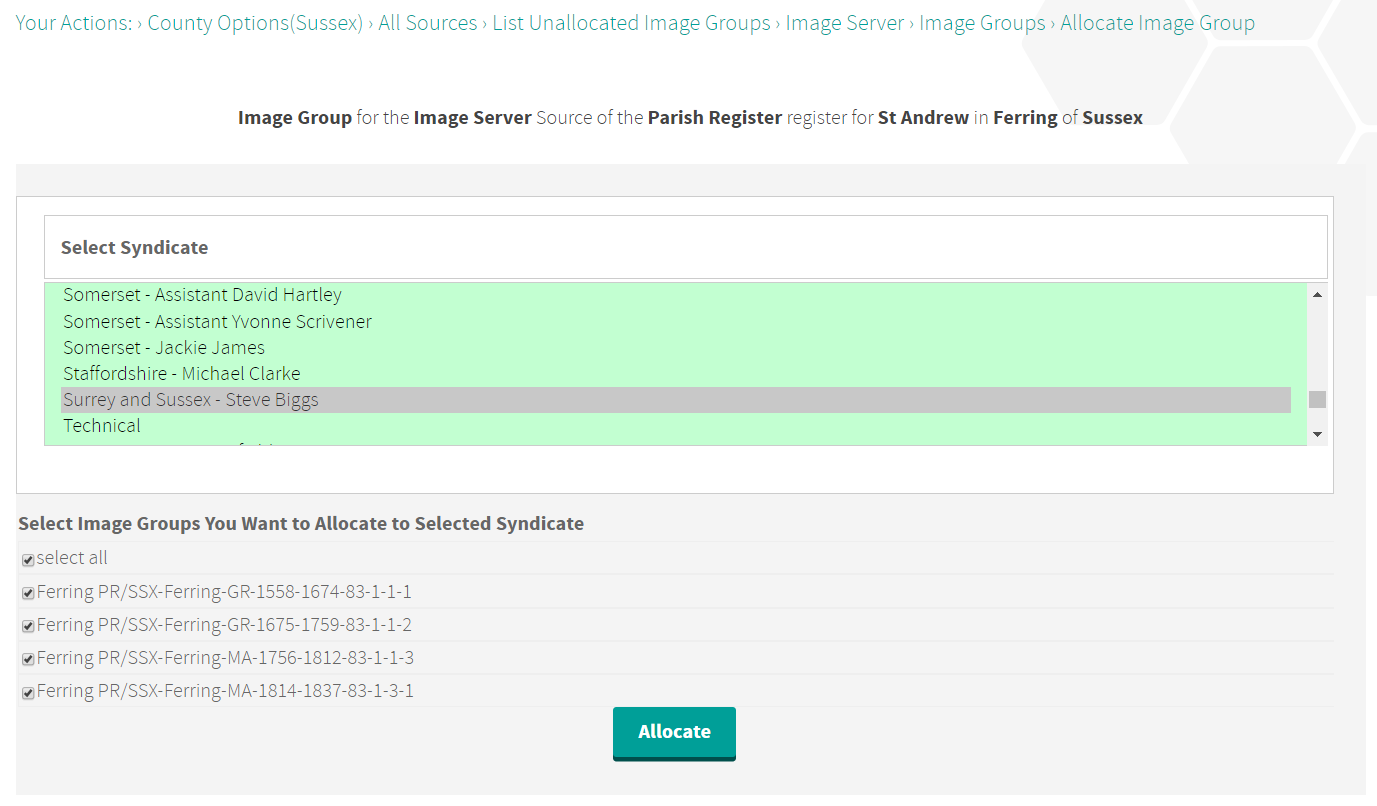
The image Status is changed from Unallocated to Allocated by the allocation action and the Image Group is taken off the listing where transcribers can choose their next work.
If you inadvertently allocate the wrong Group, there is an action under the Image Group display to Unallocate Image Group
. This is available only when all images under the Group are in the Allocated status:

The SC assigns the Allocated images for transcription. When the SC is satisfied that the transcription is complete, they select an action which automatically sends an email to you and the Group Status becomes Completion Submitted
.
Marking image groups as complete
You can also check for submitted completion allocations via the action List Completion Submitted Allocations
from the All Sources display:
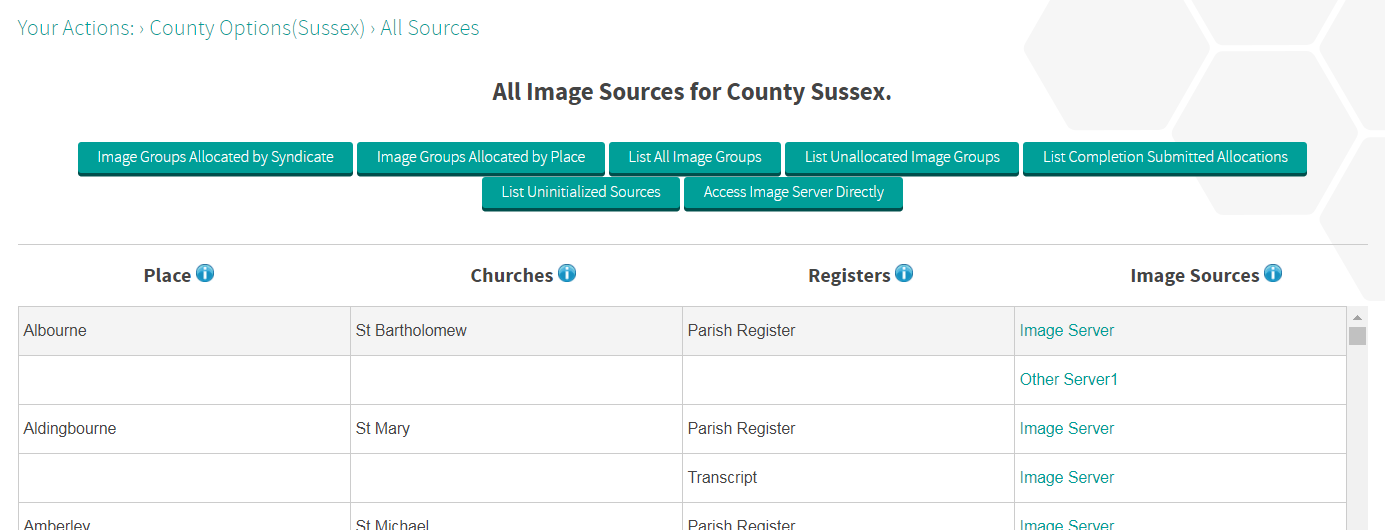
This shows the list:

You can then select the Image Group and click the Accept as Completed
action button:
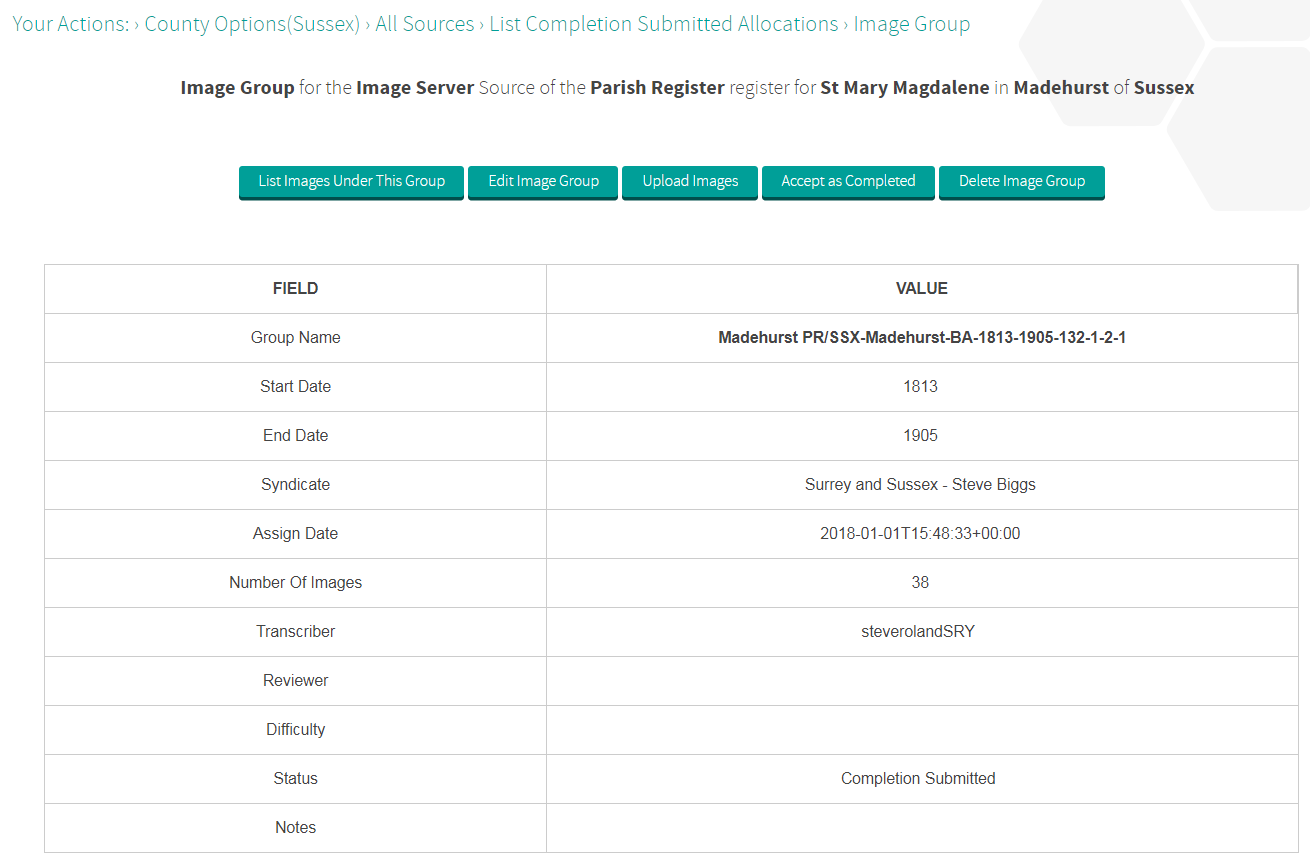
This changes the status to Complete and the Allocation is automatically removed from the syndicate.
Syndicate Coordinator tasks
Assigning images to a transcriber
Image Groups are allocated to your syndicate by the County Coordinator (CC) of the relevant county.
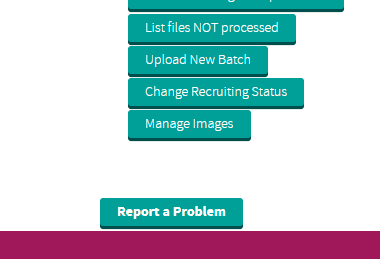
As SC, you access the image management actions by selecting Manage Syndicate
then Manage Images
:
This displays a list of your Allocations:
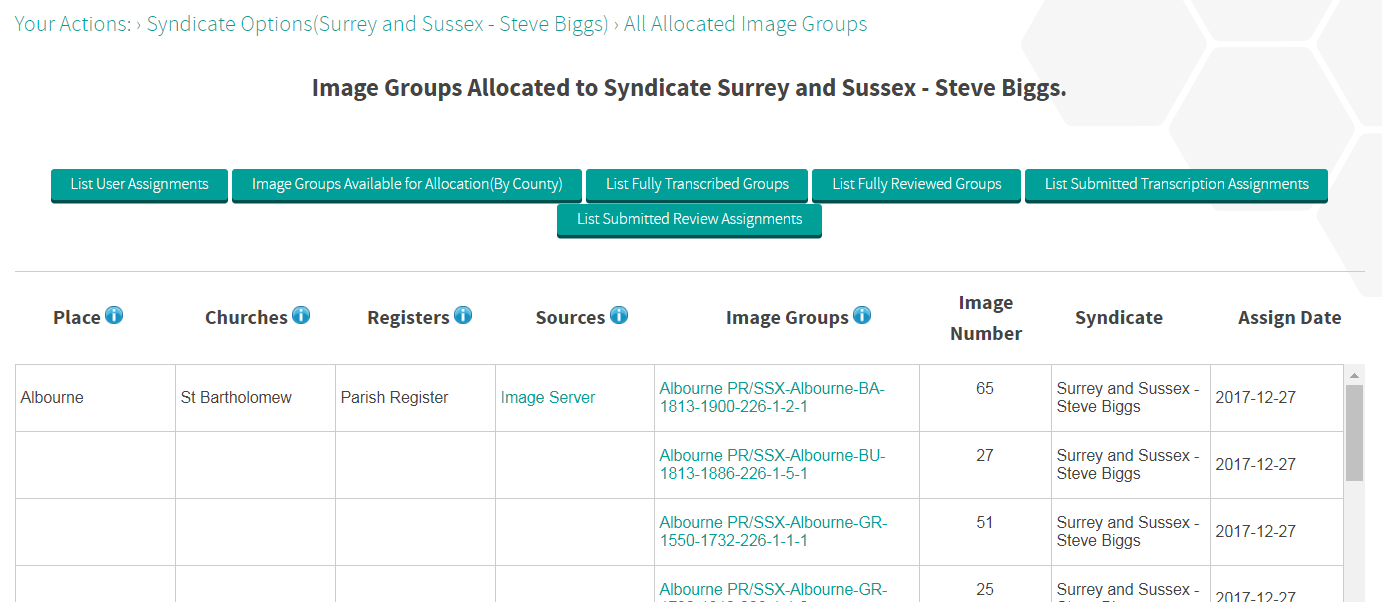
You can assign images to a transcriber by clicking on the Image Group name in the Image Group column to show the Group details:
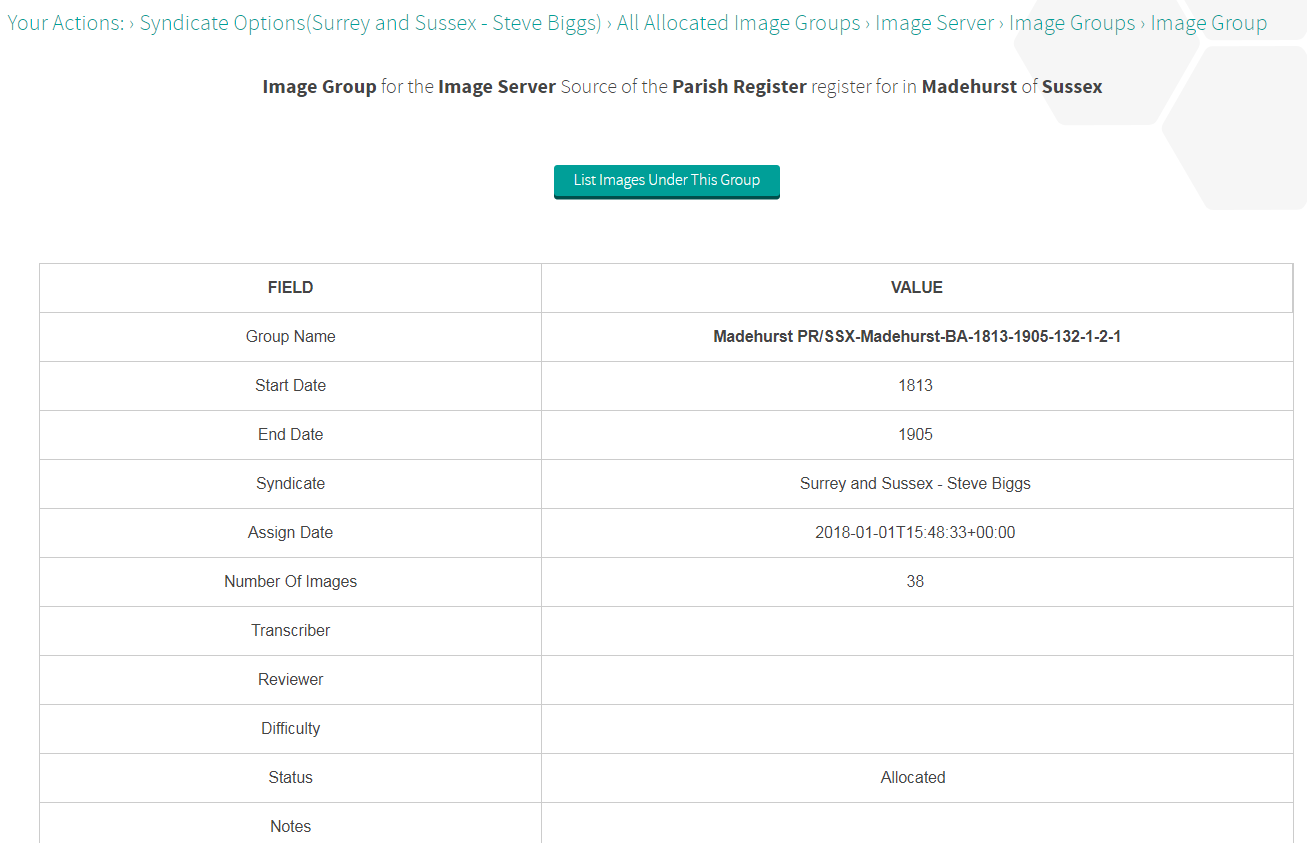
Then click List Images Under This Group
to see the images listed,
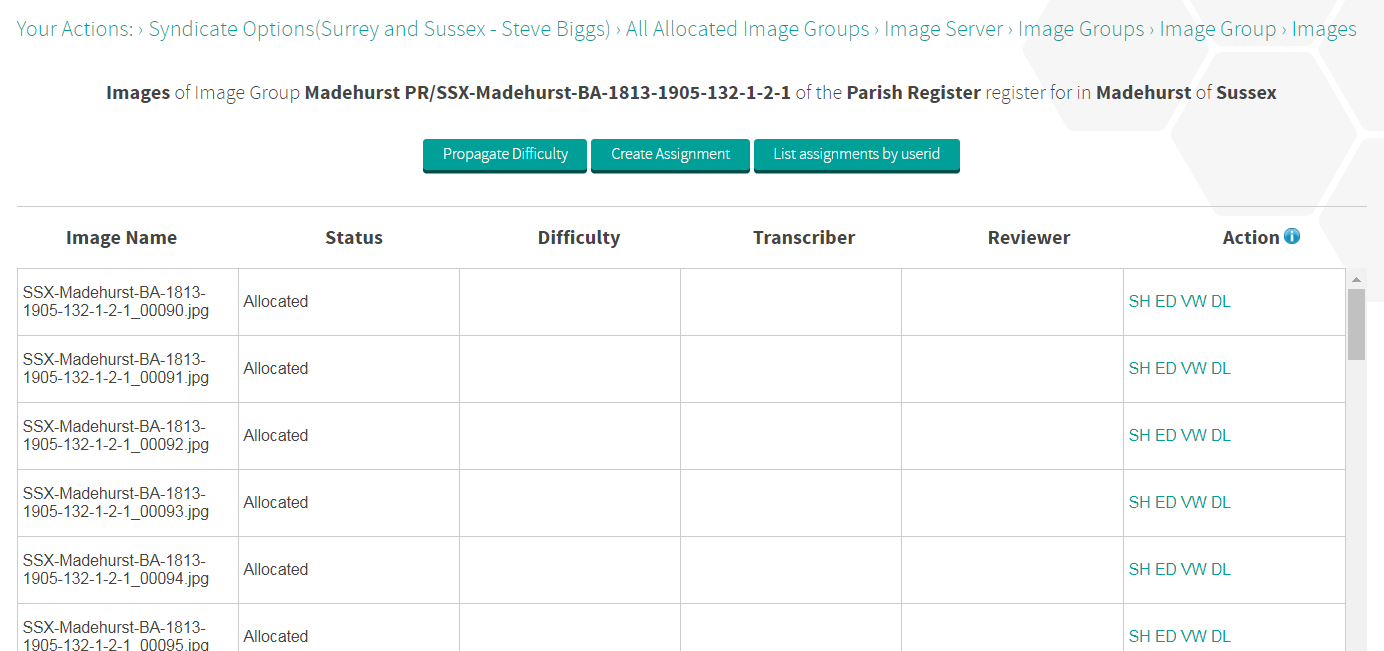
followed by selecting Create Assignment
:
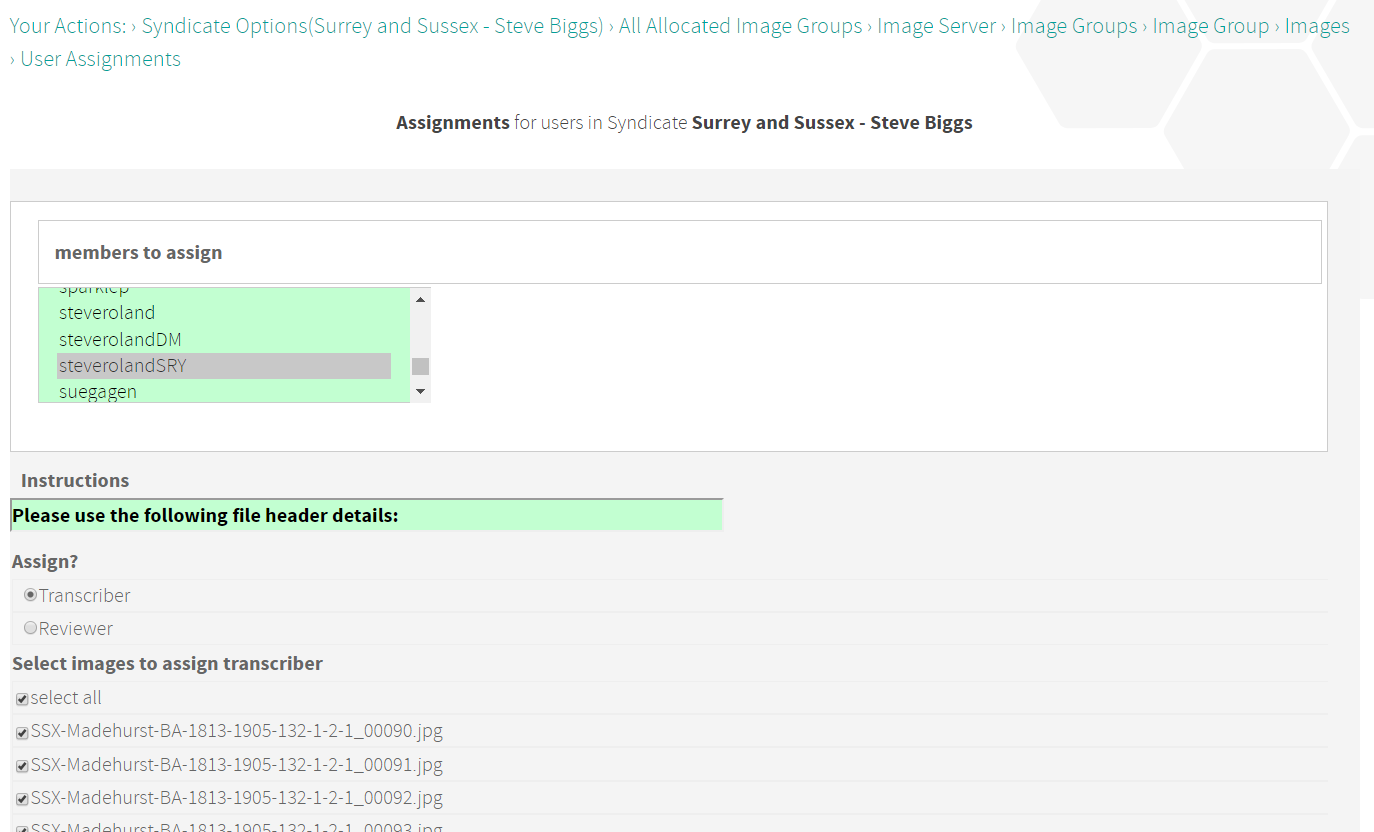
Select the transcriber, add any required instructions and select the Images to Assign (you can select all or a range by clicking the first in the range then holding down the Shift key and clicking the last in the range) then click Submit
. This changes the Image Status from Allocated to Being Transcribed.
You can unassign (UN) images from the transcriber, if required. The Status of the images is changed from Being Transcribed to Allocated by this action and the Assignment is deleted.
Alternatively, you can re-assign (RA) images to another transcriber if required: the Status remains Being Transcribed. These actions are accessed from the List Images display (Figure 28) by selecting List Assignments by userid
to see:
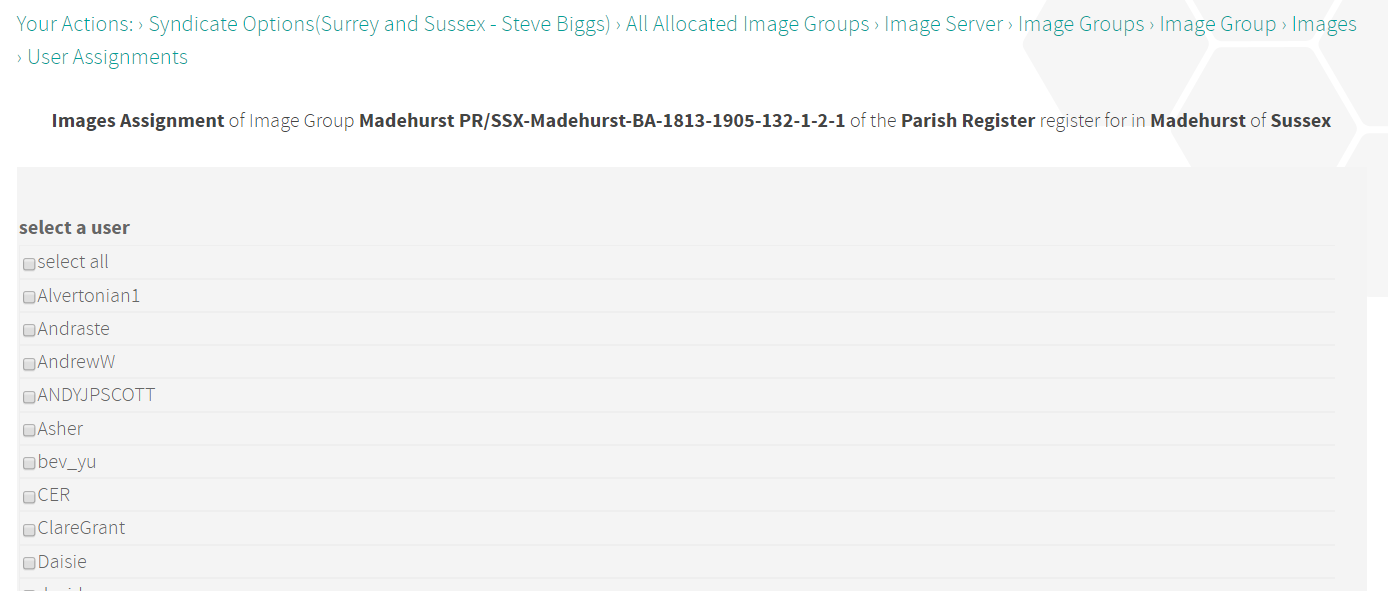
Select the required UserId(s) and then click Submit
to see the actions:

When the transcriber is satisfied they have finished an Assignment and uploaded the file to FreeREG, they select an action which automatically sends an email to you and the Image Status changes to Transcription Submitted.
Checking the transcription
You can check for submitted transcriptions by selecting List Submitted Transcription Assignments
(see Figure 26) to show the submissions:
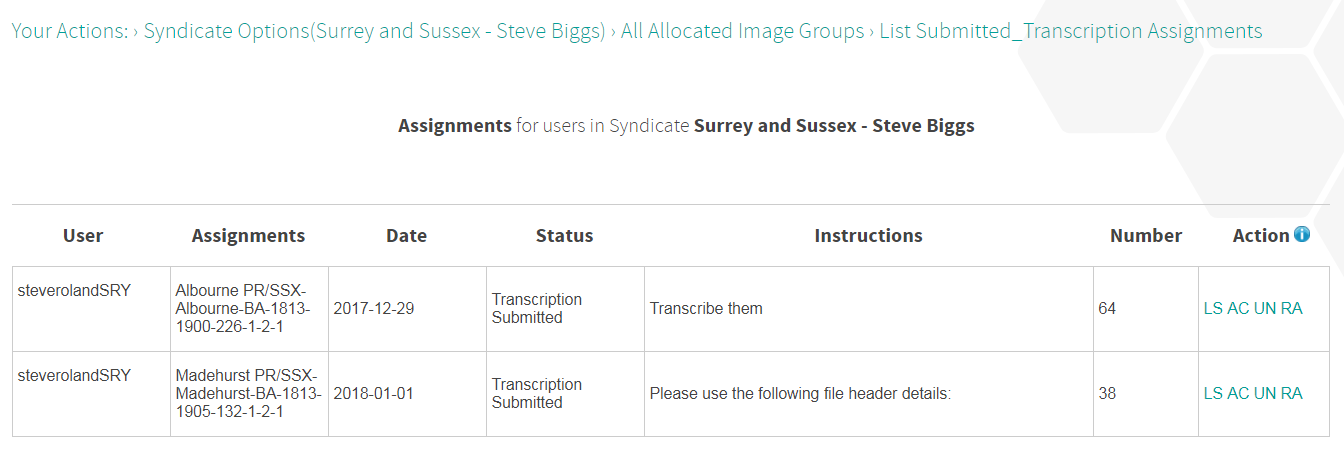
If there is more than one assignment, the list shows them at Assignment (Group) level as shown in Figure 32, above. If there is only one, you will see a list of images in the Assignment: if there is more than one, you can see the images for a particular Assignment by selecting the LS
(list) action for that Group:
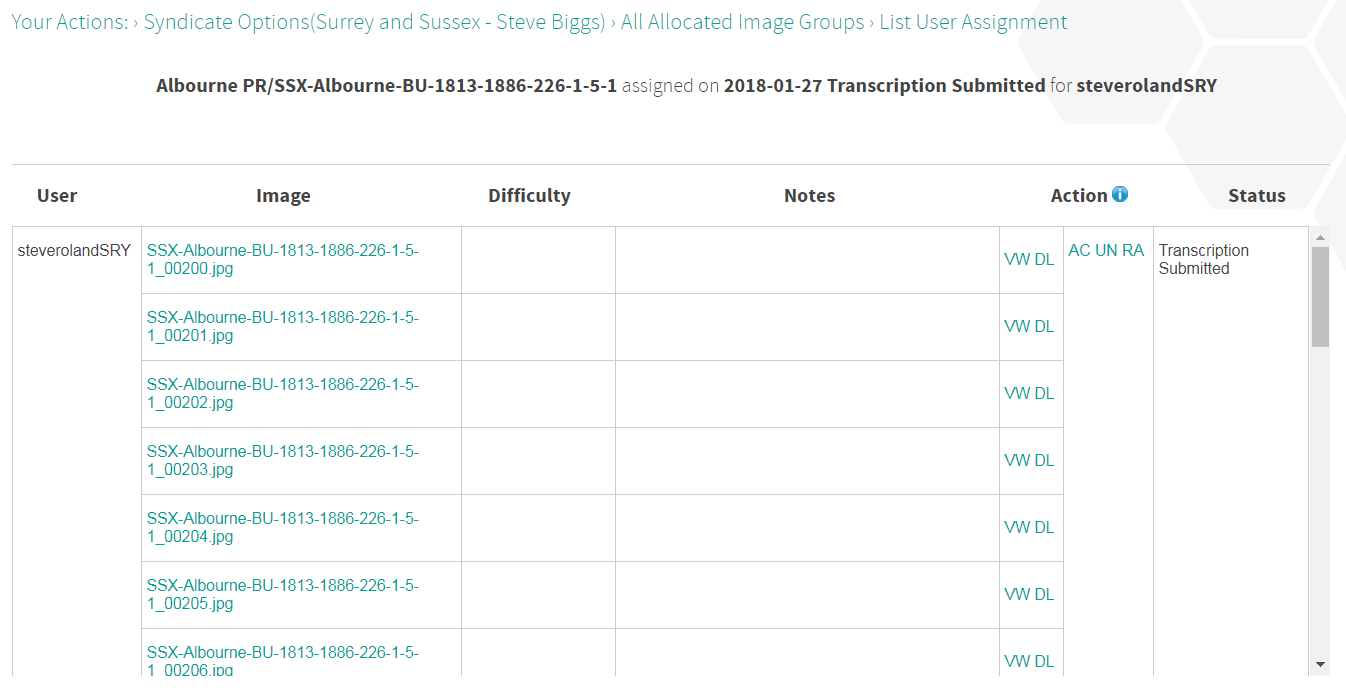
You then check the submitted transcription and, if satisfied, complete the Assignment by selecting the action AC
. This automatically changes the Status from Transcription Submitted to Transcribed and deletes the Assignment. If you are not satisfied, then work with the transcriber until it is completed.
Review (optional)
The following actions are an optional part of the process.
You may Assign images to another syndicate member as a Reviewer (Figure 29, by selecting the Reviewer button). The status changes from Transcribed to Being Reviewed.
You can re-assign (RA) images to another Reviewer if required: the status remains Being Reviewed
.
You can unassign (UN) images from the Reviewer if required: the status of the images will change from Being Reviewed
to Transcribed
and the Assignment is deleted.
The Reviewer re-transcribes or does whatever review work you request, then selects the action which automatically sends an email to you: the status changes to Review Submitted
.
You then check the Reviewer’s work and if satisfied, accept (AC in Figure 32) the Assignment. This automatically changes the status from Being Reviewed to Reviewed and deletes the Assignment.
On completion
When you have accepted that all images in an Allocated image Group have been transcribed, click the Send Complete Email to CC
button. This button is available only for groups that have the Status of either Transcribed or Reviewed:
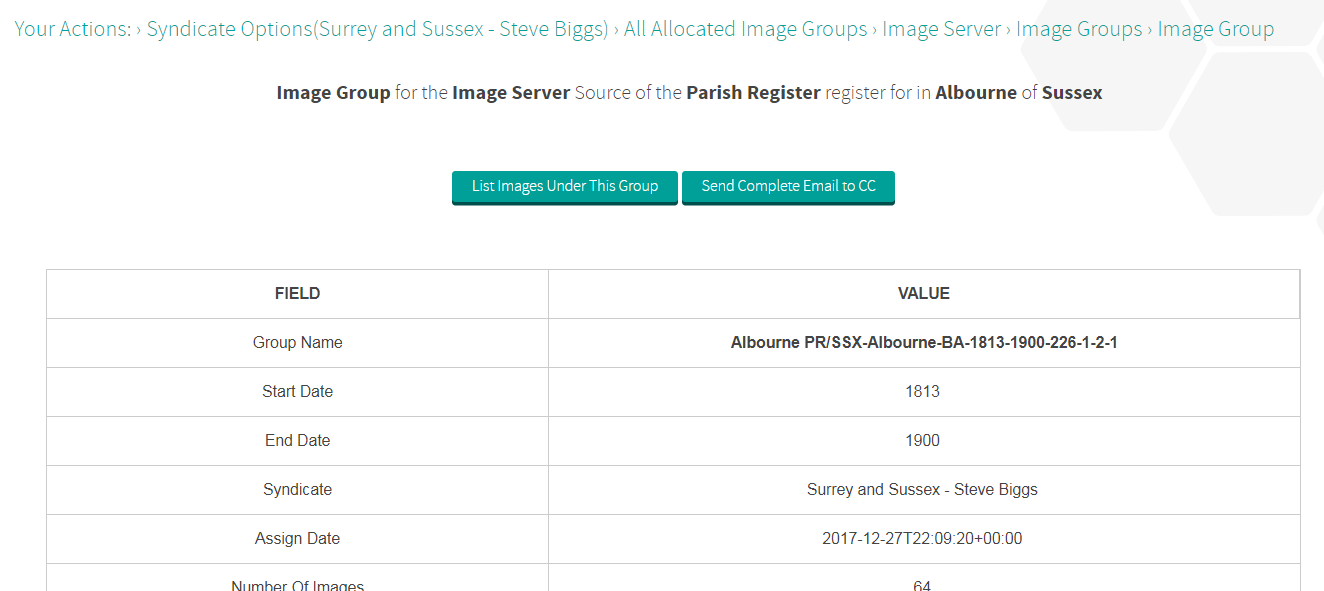
This sends the email to the CC and changes the Group Status to Completion Submitted.