Uploading files to the Image Server
This page has the information you need for uploading files to the Image Server. Your files can be in almost any format.
We suggest that you become familiar with the basic tasks and Image Server (IS) Actions, on The Image Server page before uploading any image files for your county. If this is not possible for you, the tasks here will soon become familiar — the step-by-step instructions and screen-shots below will guide through the essential preparation and the actual uploading.
Work at your own pace, of course — we know there are many demands on your time — but please make a start. (If you run into problems that you can’t sort out yourself, you know who to contact!)
Essential preparation
Some things must be done before you can upload any Images for a Register. Find your starting point in the list below and follow the link given, then continue with the remaining steps.
- Do the Place, Church and Register exist for your new Images? If not, create them first, in the usual way.
- Are there images for that Register on the IS already? If yes, start by checking that you have entered all the Image Source information that you have. If not, then start by creating the link between the Register and the IS.
- In all cases, keep following the remaining steps, to the end of the preparation.
Create an IS link for your Register
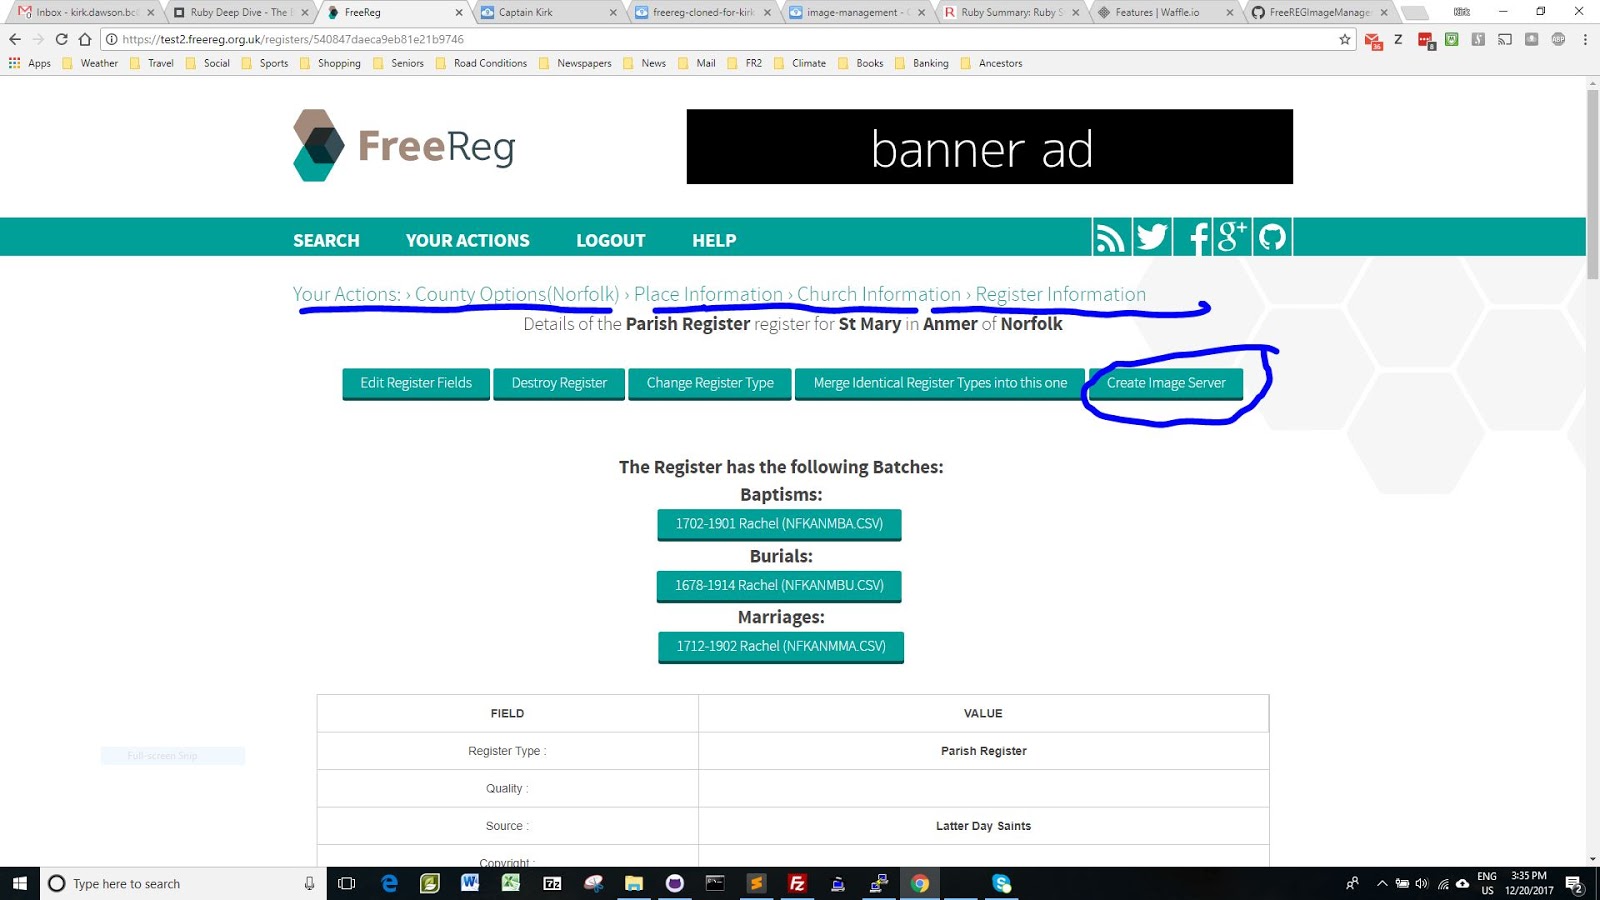
As CC, use your Place Actions to navigate through the Place and Church, down to the Register that you wish to associate with the Image Server.
You should see a Create Image Server
button, as in figure 1 — if the button is not there, the Register is already linked to the IS and you should be able to see something like the screen in figure 3.
Create Image Serverbutton
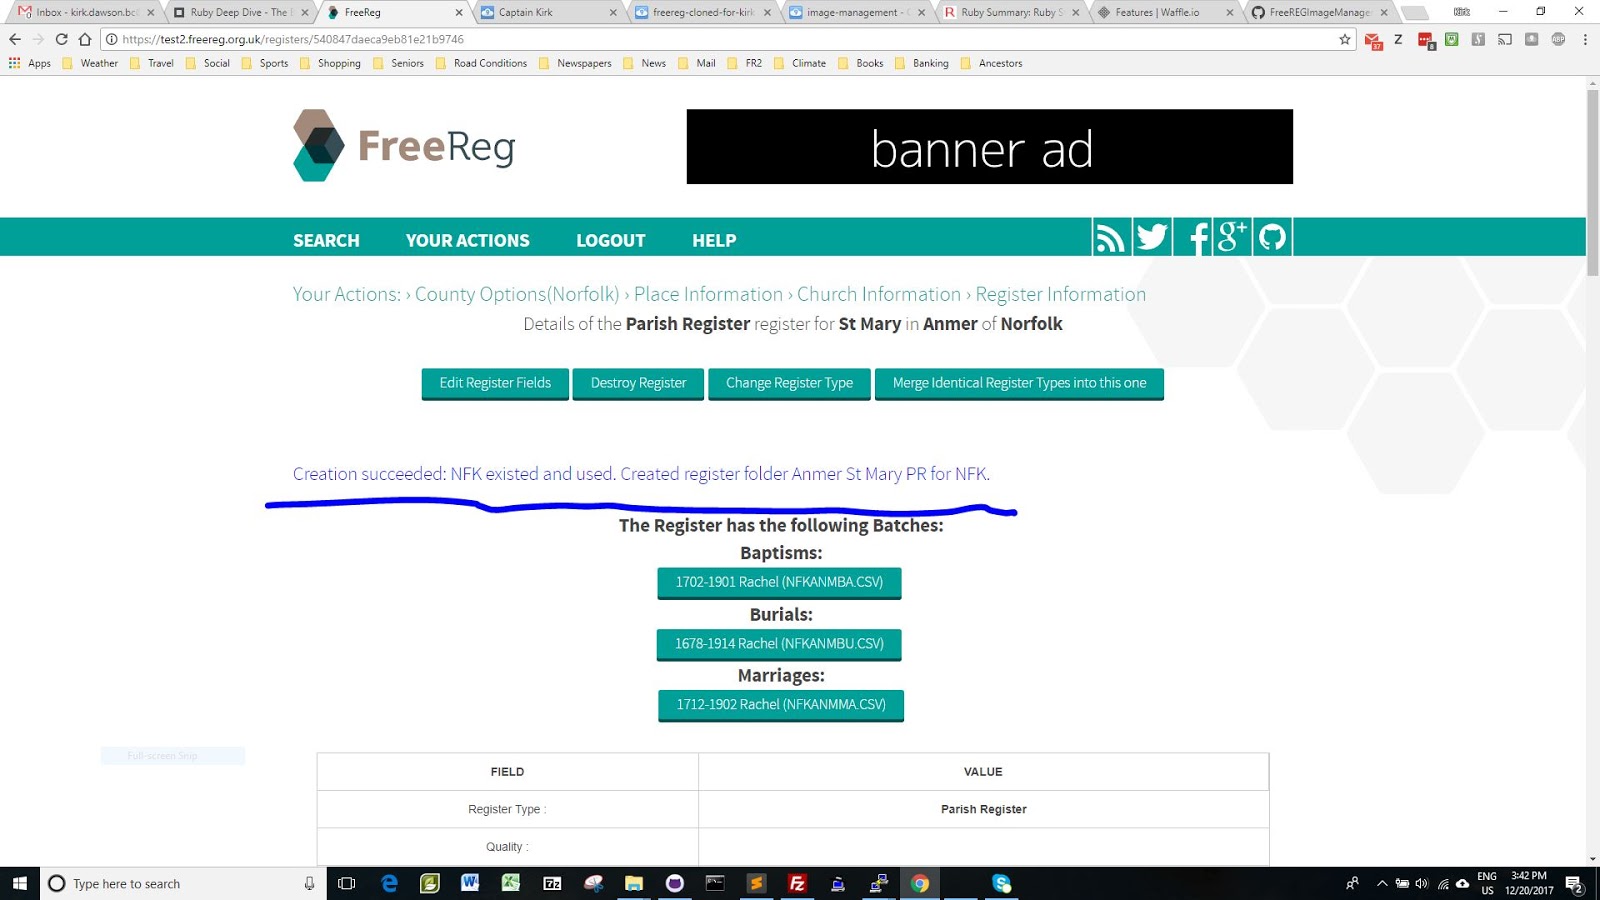
Click on that button. The system will create the linkage and the appropriate folder on the Image Server (see figure 2, below). Notice the success message and that the Create Image Server
button has disappeared.
Enter Image Source information
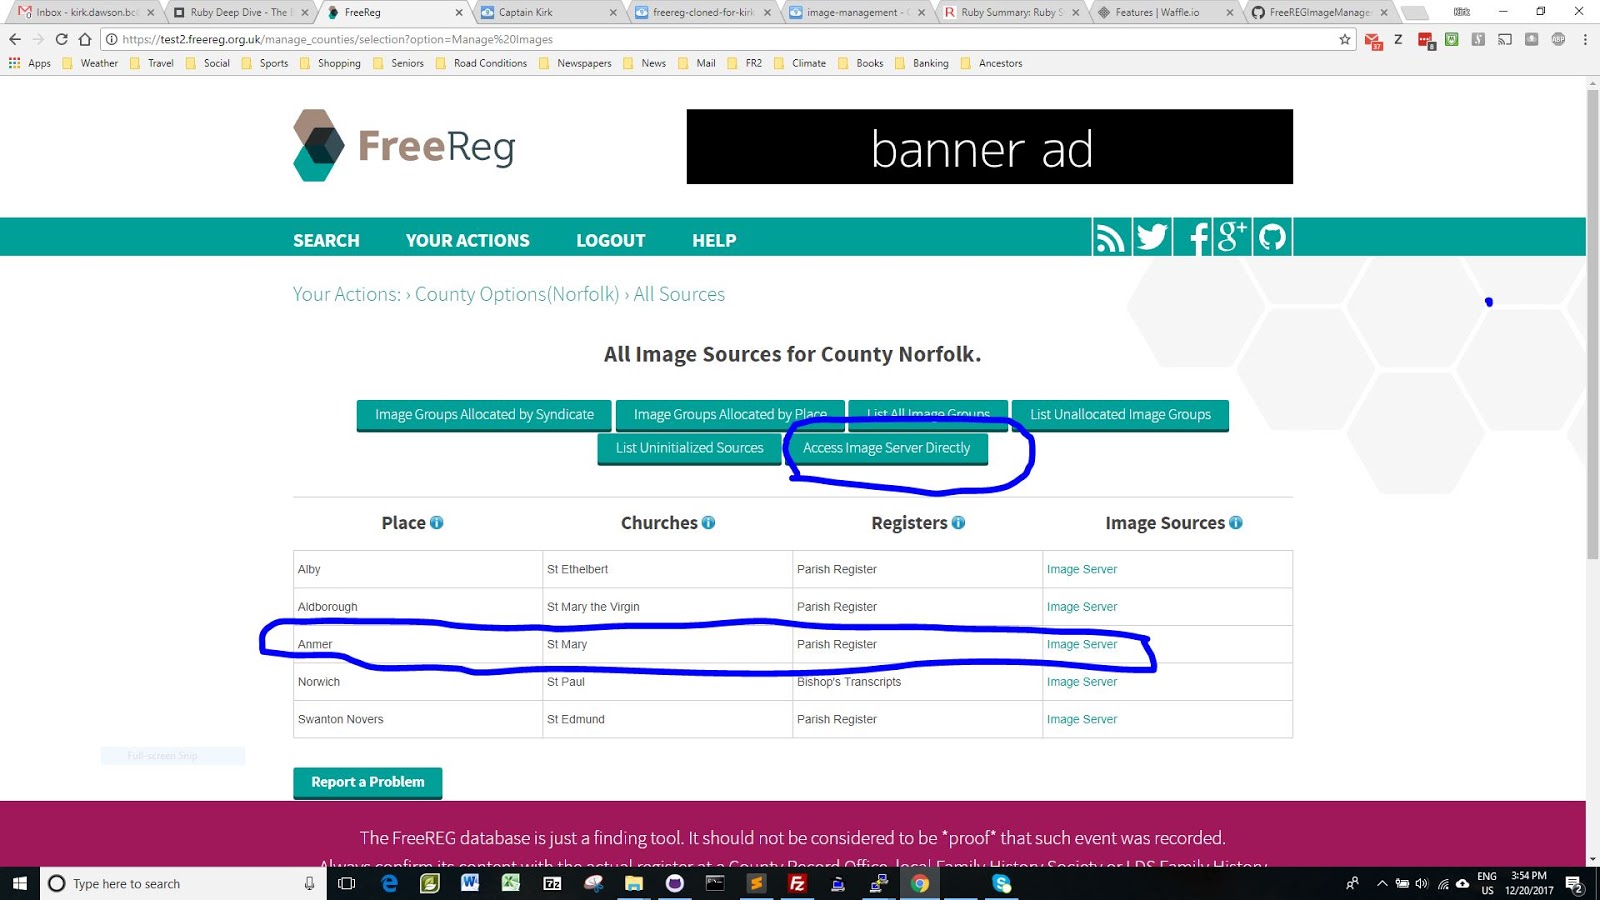
Now go back to your Actions and select the Manage Images
action. You should see an Image Server link for the Register that you just created.
If you select the Image Server
link for the register (not the Access Image Server Directly
button) you will get a screen of basic information about the Source of these Images — it will be blank for a new Source.
Select Edit Image Source
and enter the information about this specific source including the start and end dates. If this is a new Register but there are already other Registers with the same information (except dates), you can go to one of those Registers and propagate (cascade) the information to this new one.
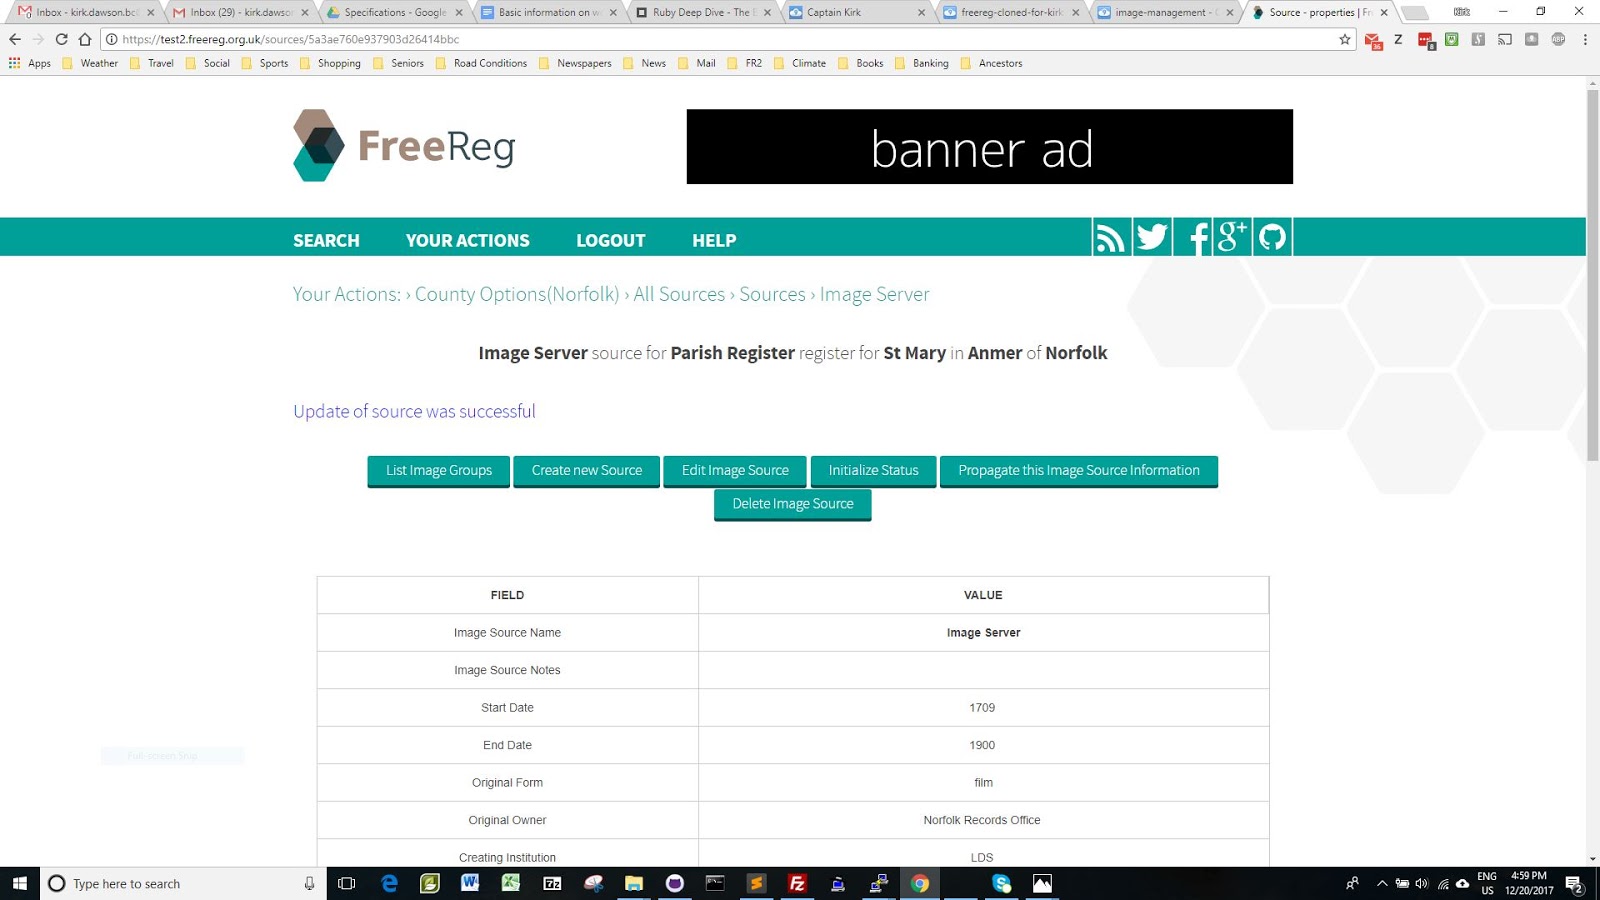
Image Serversource
Create Image Group
Now select the List Image Groups
button to get a list of the Image Groups — there will be none on a new register! So, select the Create Image Server Group
button and enter the appropriate information. Note that the years have to be within the range of years in the Image Source.
Each Image Group will eventually be a set of images that will be Assigned to a transcriber. So it is best to create a number of smaller groups. And it is best that the Image Group name means something so that you know what is in that group. Something like NFK-Anmer-PR-BA-1813-1900 would be informative. Then, the transcriber could create a folder on their computer with this name to hold the images that they download for transcribing. This would keep each batch of work separate and easily recognizable. This naming style is not mandatory and any unique Image Group name will do — the style of the example is just our recommendation.
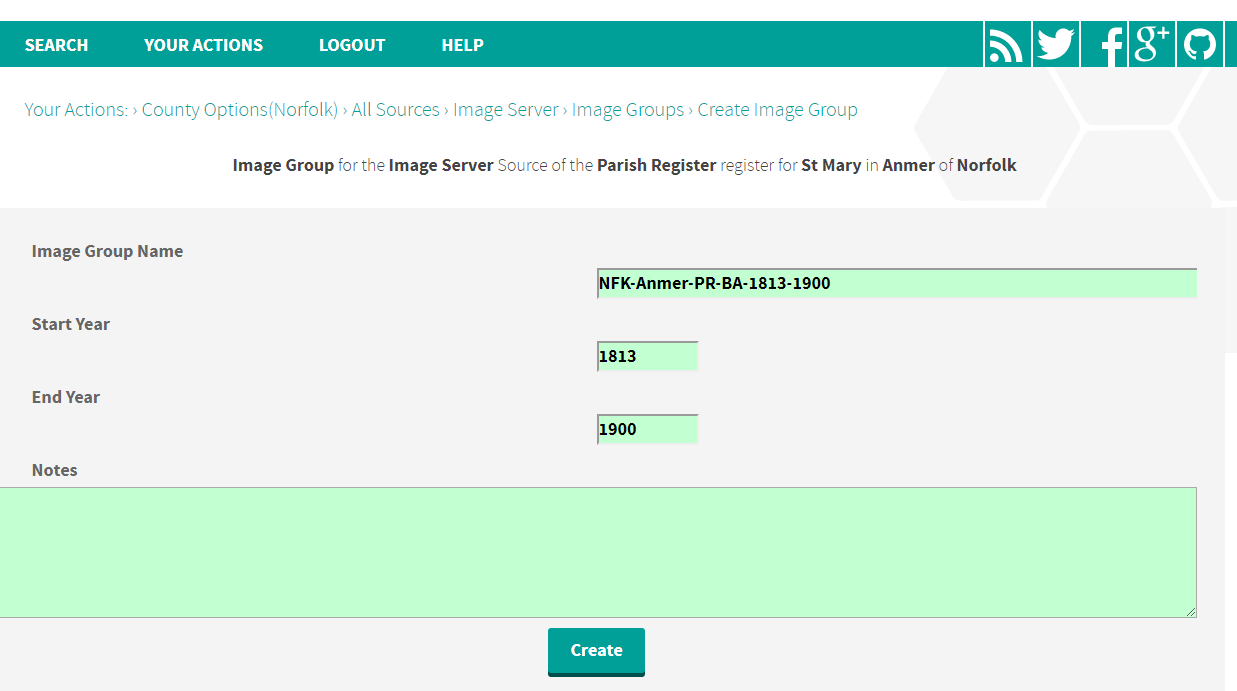
Do this for all the Image Groups that you wish to create.
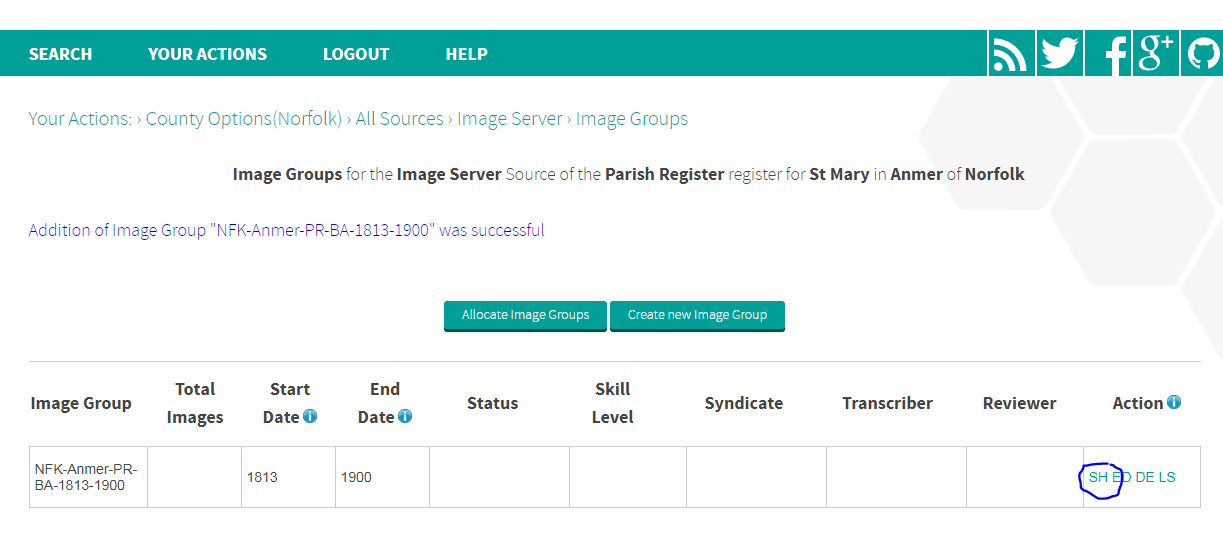
Prepare the filenames for your Images
We often receive images that have filenames such as 1.jpg — these can easily cause confusion when a transcriber downloads them to work on them. Also, the server puts all Images into the folder it has created for the Image Source, therefore it is necessary for the Images to have unique names. So, it is best to change the names to something meaningful before uploading. In this way, when they are downloaded, they will still be identifiable.
We recommend the format AAABBBCCDNNN.fff, where:-
- AAA is the Chapman code
- BBB is the Place/Church code to be used in the transcription batch filename
- CC is the Record type
- D is the Group sequence number, increasing for each fiche perhaps
- NNN is the sequence number
- fff is file extension (jpg or pdf, for instance)
For example — SSXALBBA3001.jpg where the 3 is, say, the third range of years and all Images would be within the Image Group for Albourne PR named SSX-Albourne-BA-1813-1900-226-1-2-1
To change your filenames, there are some free bulk renaming programs: one such is — BulkRenameUtility (Windows only). For Mac users, Finder can rename sets of files.
Using this format for your image filenames is not essential for the operation of the system — however, the filenames do have to be unique within a Source, not just within an Image Group. If the transcriber saves the Images to their computer, they should be able to identify the Image Group to which they belong.
Uploading images
The uploading
Now select the SH
(show) button for the Imager Server Group for which you want to upload images.
On this display, select the Upload Images
button:
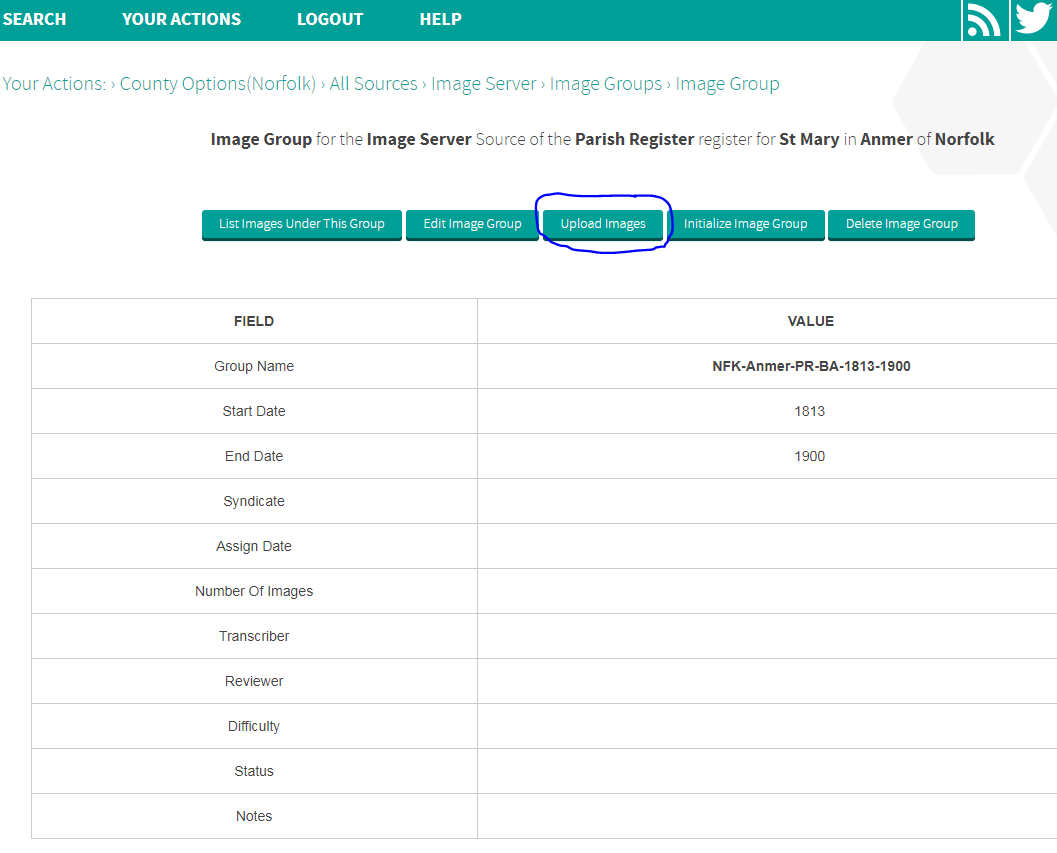
Upload Imagesbutton
This will take you to the Image Server. Please note that the displays from the Image Server are quite simple, without a great deal of formatting and without the standard FreeREG layout.

Choose Filesbutton
Now select the Choose Files
button. A pop-up selection box will appear, like the one you see for uploading batches. It allows you to select the images on your computer, so you must first navigate to where they are.
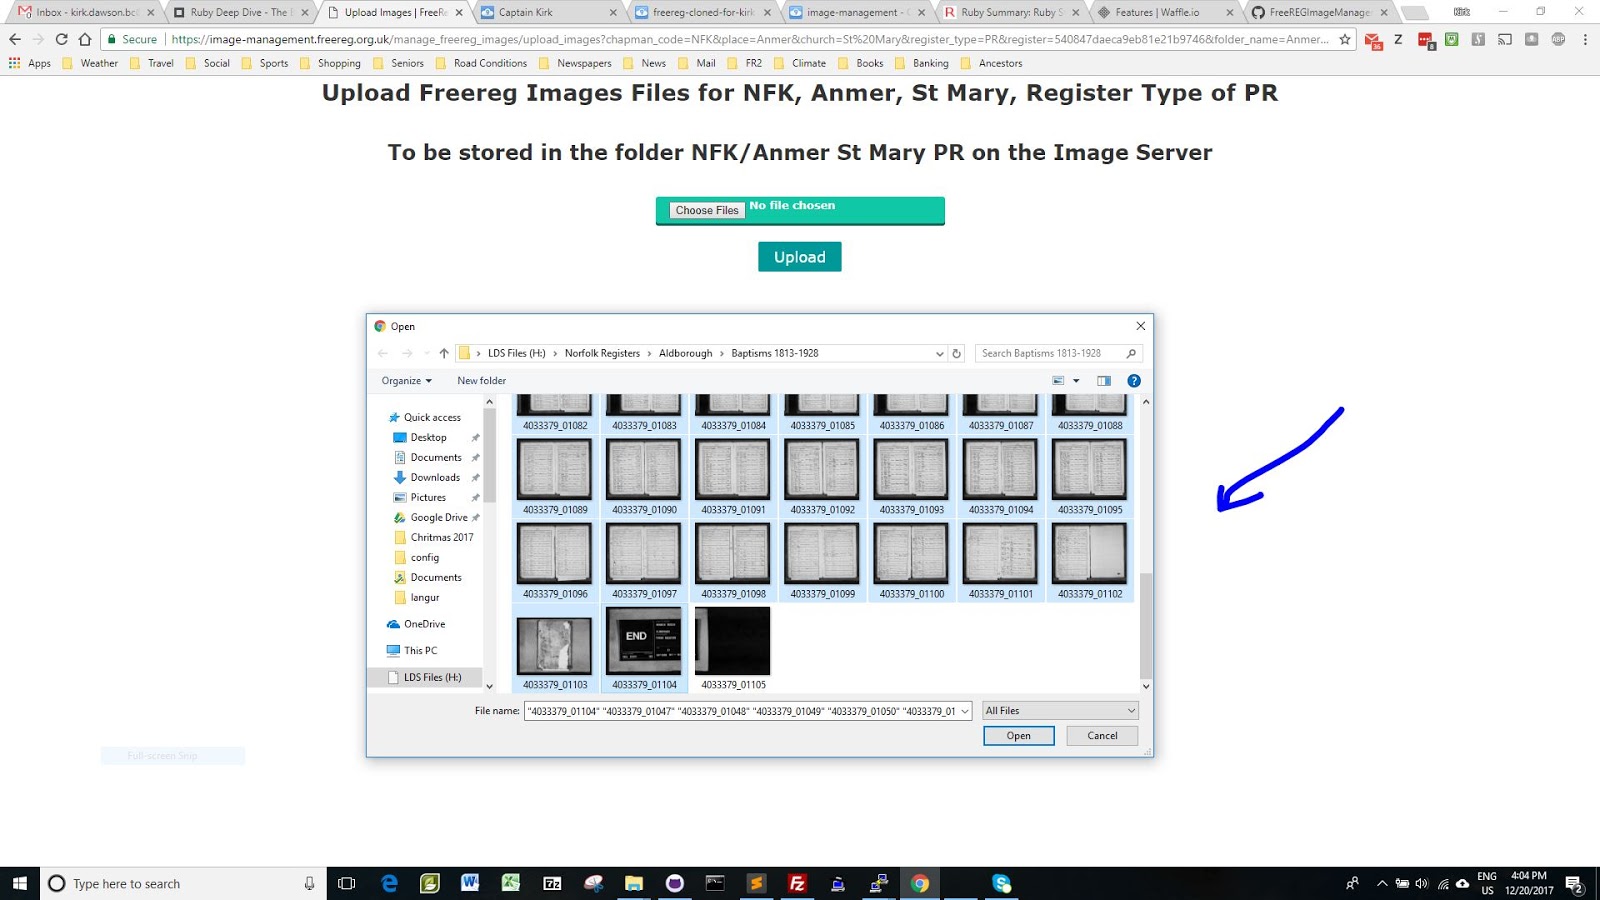
Now this display is a little different in that you can select multiple images for uploading. Use the shift key to select a range of images, or use ctrl (Windows, cmd on a Mac) to select individual images. There is a limit of 1,800 for all the characters in the filename that you have selected, so it is better to upload files in smaller batches. This is also good practice if you do not have a fast internet connection. The server will warn you if you have chosen too many filenames and will ask you to choose a smaller number, so you don’t have to count the characters.
You may upload almost any type of file. However remember that the transcriber will need to have the appropriate application to open that file on their device. So you are encouraged to restrict your file types to the common ones: jpg, tiff, txt and pdf.
When you select the Upload
button, it changes shape to a circle, letting you know that the upload is underway. The status of the upload is usually shown by browsers, often in the bottom left of the window.
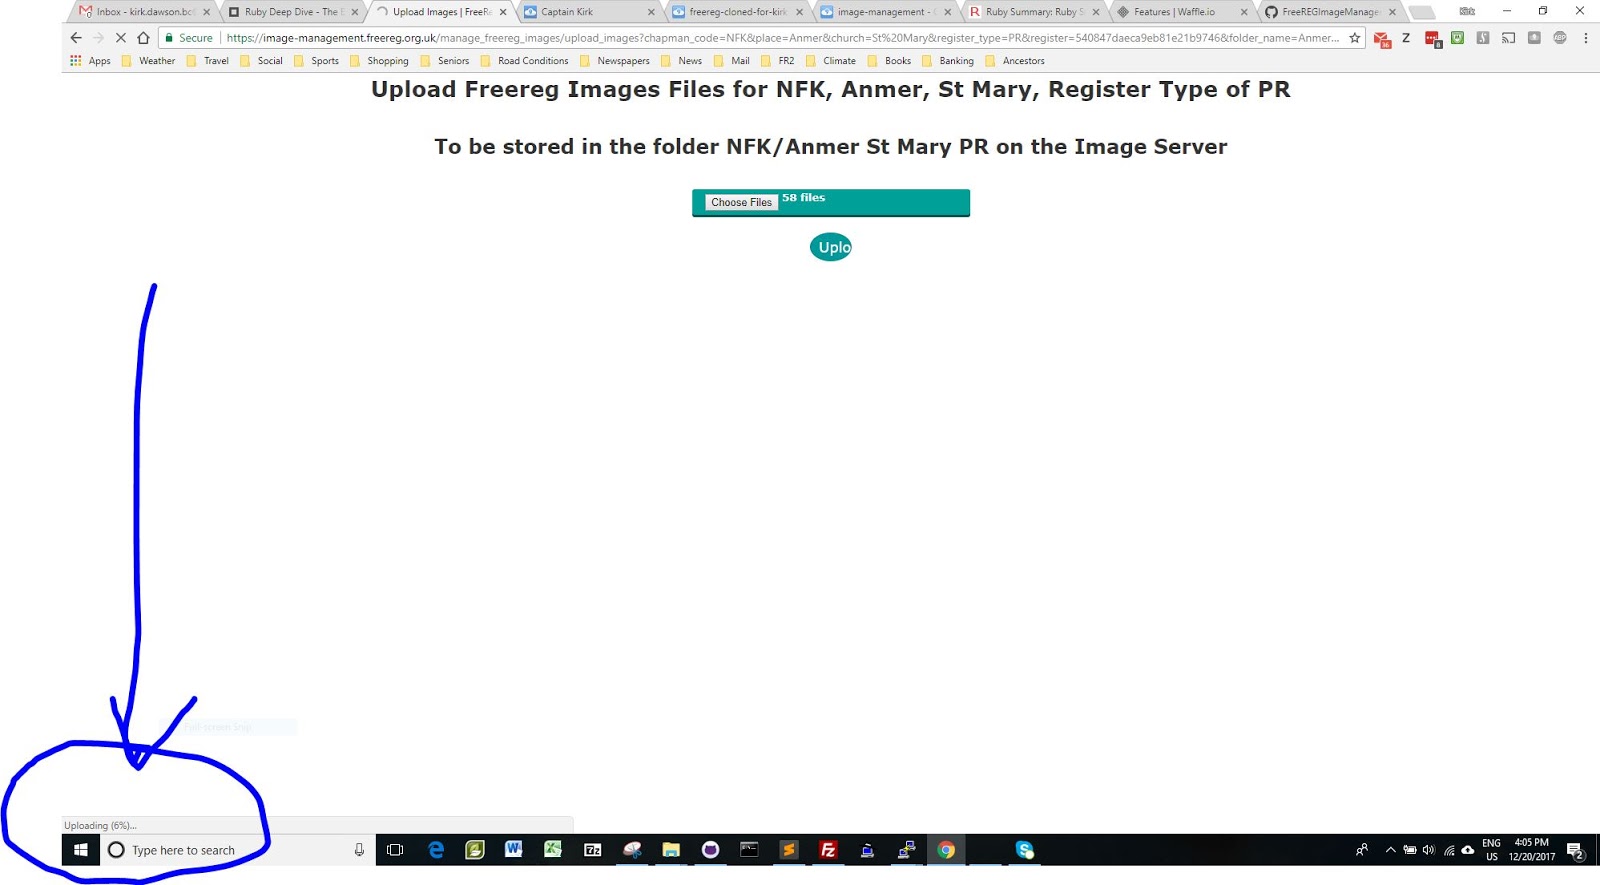
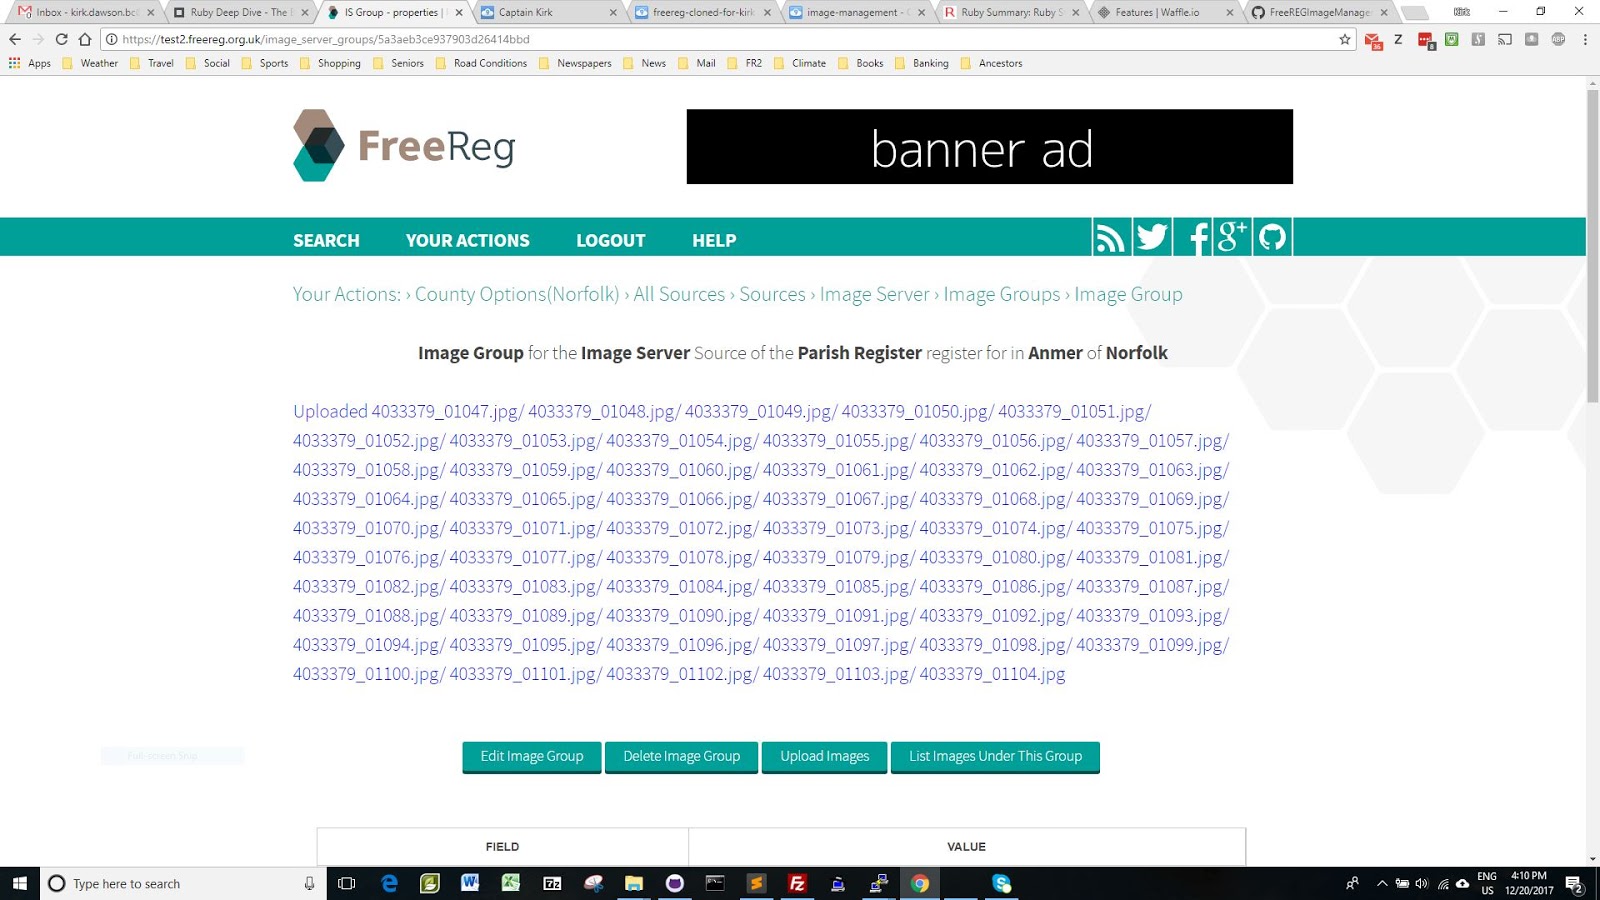
On completion you will return to the page from which you requested the upload which will contain a list of images that were uploaded.
Reviewing what is on the Image Server
As CC, you can review what is on the Image Server for your county directly: from the Manage Images display select the Access the Image Server Directly
Action button.
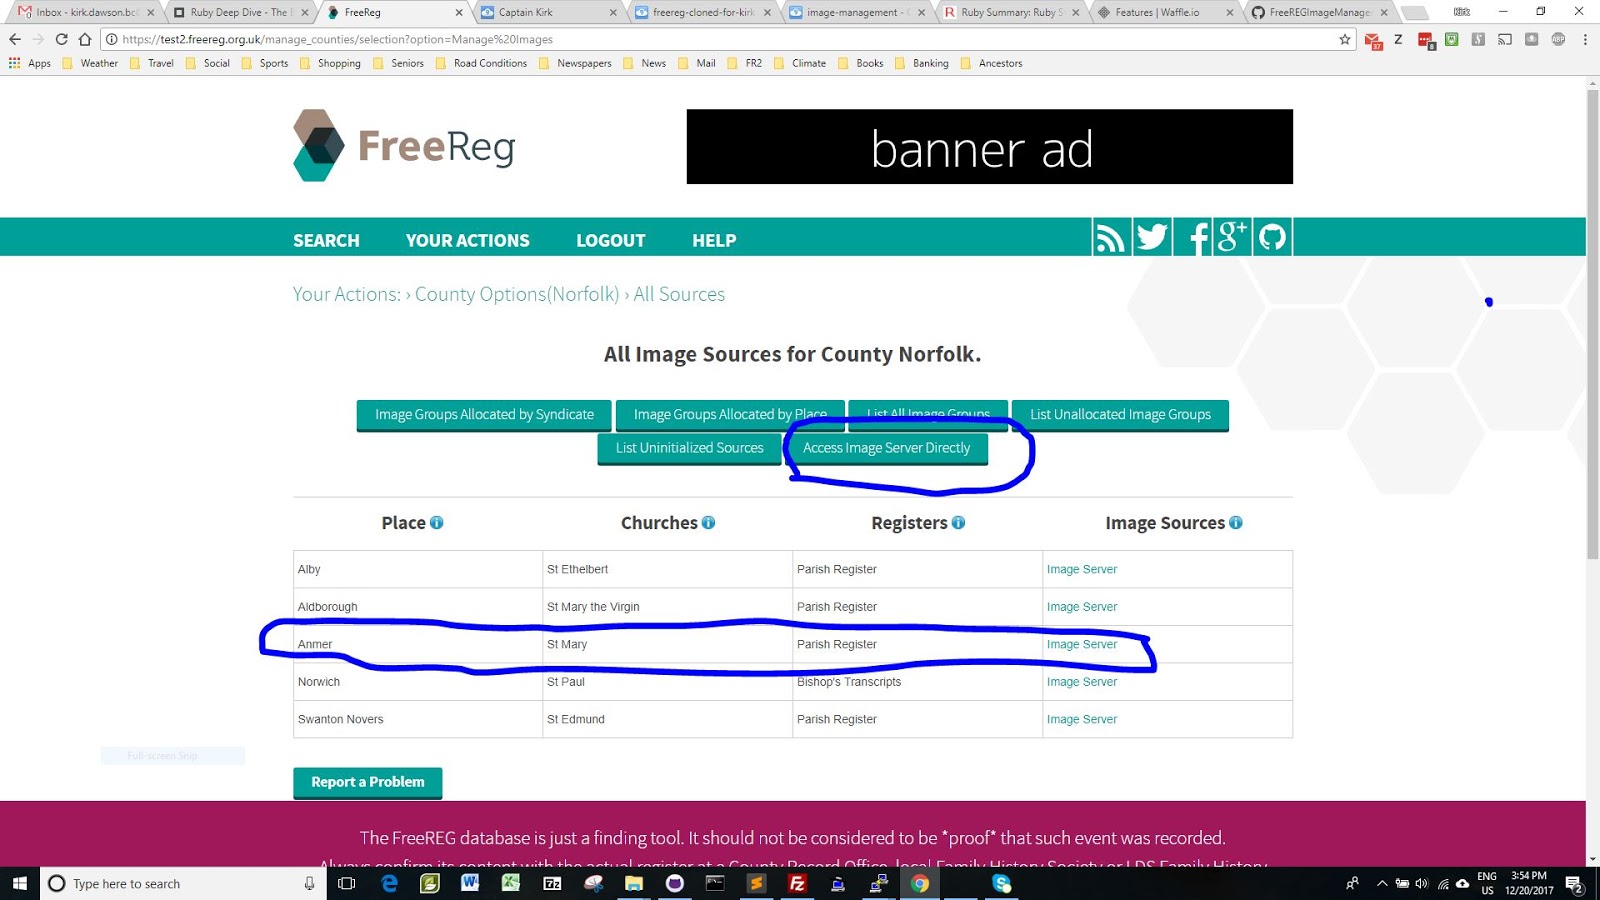
Access Image Server Directlybutton
This opens a new tab without the usual FreeREG formatting. The display lists the Registers that have Images.
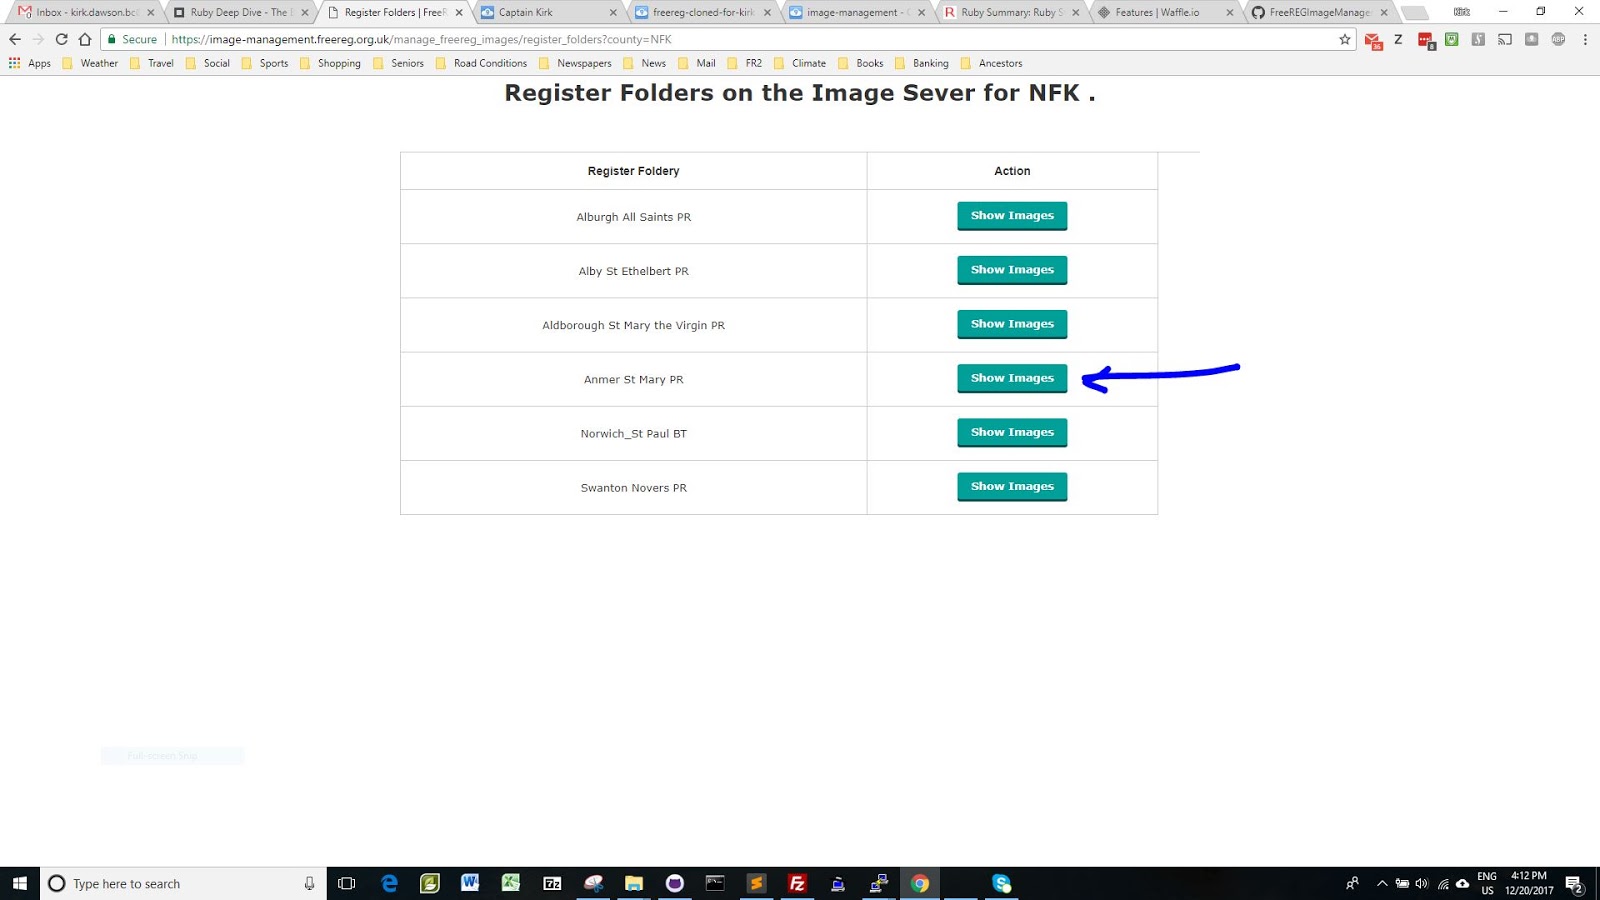
If you select a specific Show Images
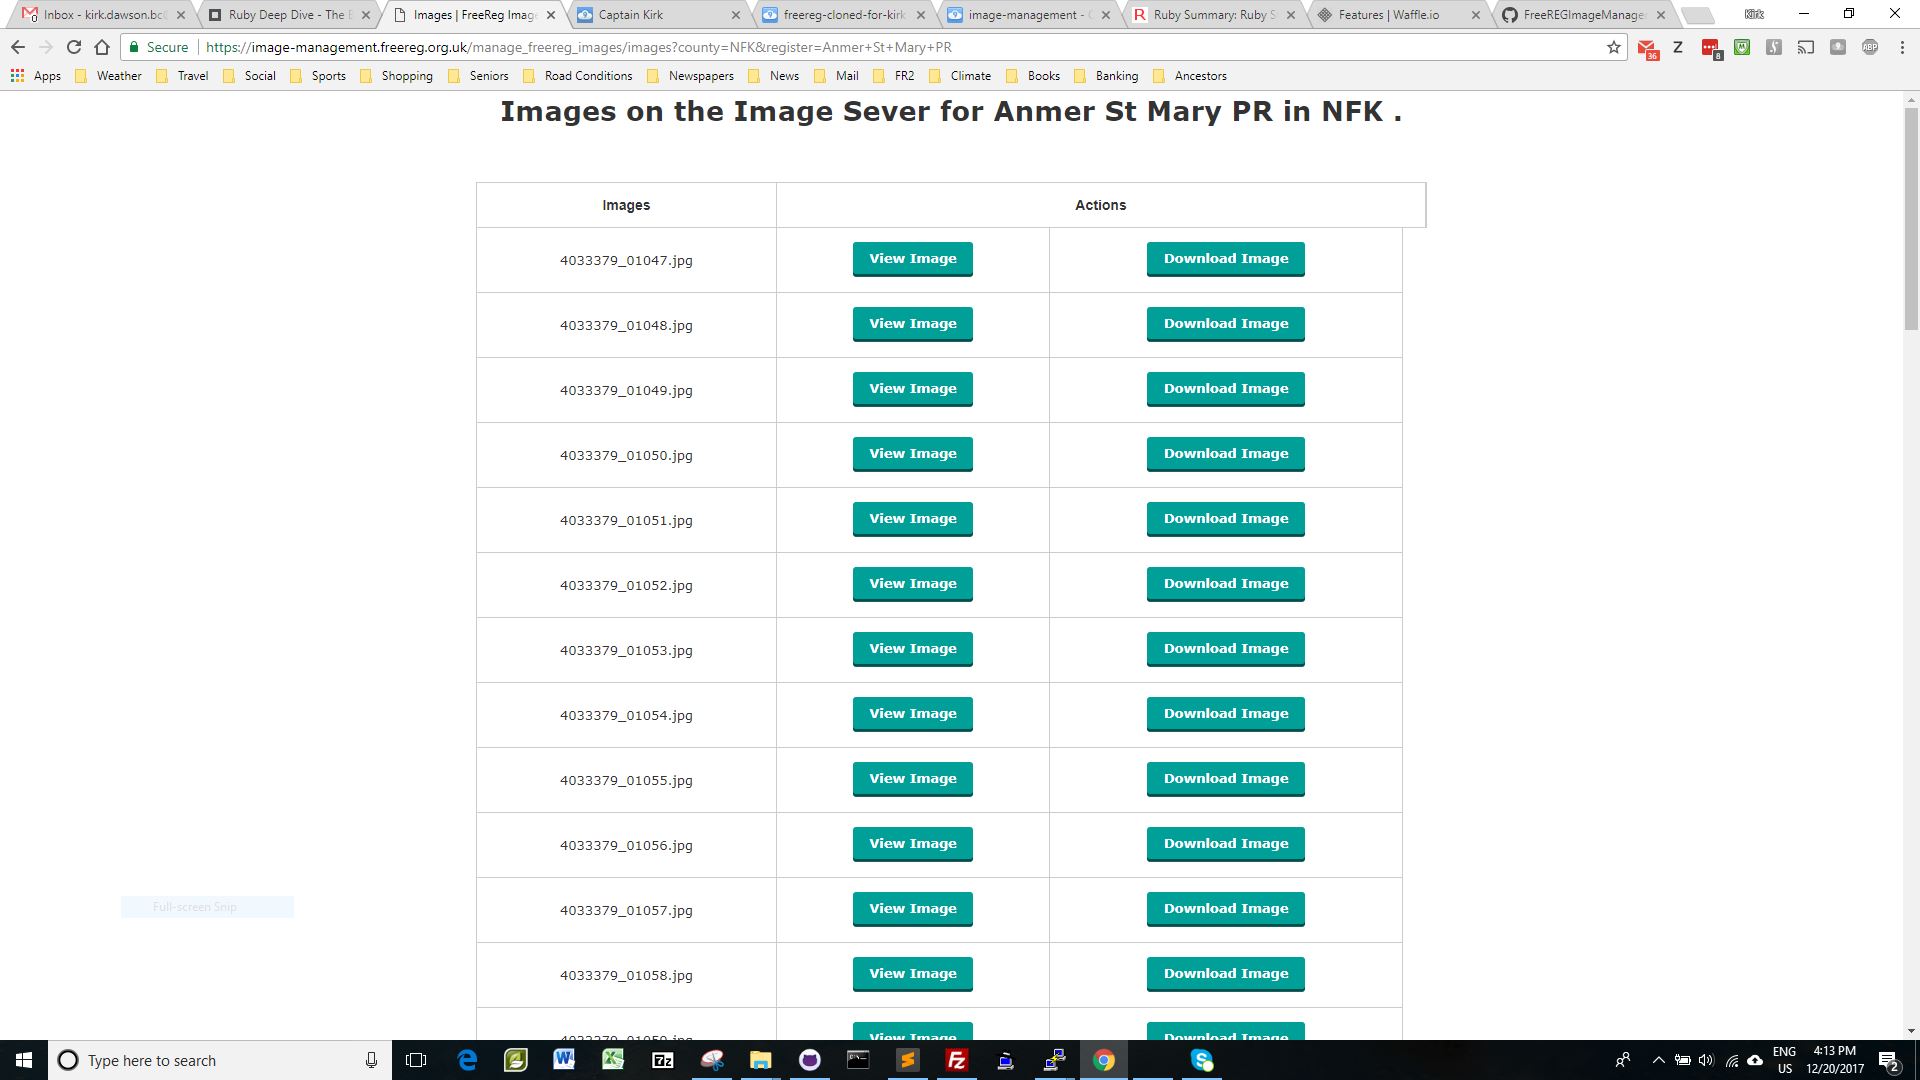
button, you will see a listing of all Images that are there. You can view and or download a specific image.
Please note that if your browser can’t display the image file, it will simply download it for you.
